About this course
Localizing your application means adapting it to different languages or regions, which can be difficult. Dealing with translating the text, routes, and content while keeping your code organized and easy to manage. Additionally, the need to make quick text changes can be overwhelming.
In each lesson, we will try to explain how to localize each area individually and display tools available for the job.
What Will You Learn?
- How to translate your application text
- How to translate your form validation messages
- How to translate your models
- How to convert the Date and Time to the user’s locale
- How to convert Currency to the user’s locale
- How to translate your application routes
- How to edit translations in the browser or in Google Sheets
- How to translate your content to multiple languages
And many other tips and tricks that could make your life easier!
Our Starter Kit for All Lessons
In the upcoming course lessons – you will see us using the same base started kit:
- Laravel 10
- Laravel Breeze with Blade UI Kit
Any other specific tooling will be mentioned in the lesson.
Demo projects from the lessons will be available as GitHub repository.
Have you seen something like this __() function in the code?
<div class="mb-4 text-sm text-gray-600 dark:text-gray-400">
{{ __('Forgot your password? No problem. Just let us know your email address and we will email you a password reset link that will allow you to choose a new one.') }}
</div>
These are Static Text, and in Laravel they can be translated with trans() and __() helper functions. In this lesson, we will see how to store translations and how to use those helpers.
To store the translations strings, we have a few options:
- Multiple
.phpfile(s) for each language - Or, one big
.jsonfile for each language
They both contain translations but have some key differences. Let’s discuss both.
Storing Translations in .php Files
This was the default way for quite a long time.
Example: we have a View file with a translation string using the __() helper.
resources/views/auth/register.blade.php
<!-- Name -->
<div>
    <x-input-label for="name" :value="__('auth.register.name')" />
    <x-text-input id="name" class="block mt-1 w-full" type="text" name="name" :value="old('name')" required autofocus autocomplete="name" />
    <x-input-error :messages="$errors->get('name')" class="mt-2" />
</div>
To translate this, we need to add a translation string to the /lang/en/auth.php file:
/lang/en/auth.php
return [
    'register' => [
        'name' => 'Name',
        'email' => 'Email',        // ...
    ],
    'login' => [
        'login' => 'Login',        // ...
    ],
];
Notice: “lang” Folder in Laravel versions
Looking at that /lang/en/auth.php file above, one thing you need to be aware of.
By default, Laravel static text translations are stored in the /lang folder. But in Laravel 10 that lang folder is not included in the beginning.
Running the following artisan command will add it:
php artisan lang:publishThis will create a lang folder in your root directory and add the en folder inside with default translation strings from Laravel core.
In earlier Laravel versions, you may find that translations are stored in the /resources/lang folder. That will also work in the latest Laravel version but is considered an old/obsolete approach.
So, the code __('auth.register.name') will load the translation string from the auth.php file and return the Name string.
See that auth.register.name parameter? The first part of it is the filename: /lang/[language]/[filename].php. All the other dot-separated parts are the keys of the array inside that specific file. In our case, it’s register.name.
If there is no translation with that key, or if that file doesn’t exist – you won’t get an error, you’ll just get the same key back:
Benefit of .php Files
- You can have multi-level nested keys.
- You will most likely separate your translations by the feature or sub-system. For example:
auth.php,validation.php,pagination.php, etc. This will make it easier to find the translation you are looking for. - You can have identical keys in different files:
__('auth.register.name')and__('validation.name')will both return the same translation but can be managed separately. - You can comment in the .php files. This is useful if you have a lot of translation strings, and want to add some context to them.
Drawback of .php Files
- You need to type all strings in the files immediately. Otherwise, you risk displaying an ugly key to the end user.
- Inconvenient for non-dev translator people: they will have to work with multiple files/paths and understand what they can and can’t change in the code. Especially if you have nested keys.
- Potentially bigger mess: things can quickly get out of hand, and you might end up with a lot of files and folders.
Storing Translations in .json Files
JSON files are a bit different from .php files. They contain a single list with all the translation strings.
In our blade, the translation will look like this:
resources/views/auth/register.blade.php
<!-- Name --><div> <x-input-label for="name" :value="__('Name')" /> <x-text-input id="name" class="block mt-1 w-full" type="text" name="name" :value="old('name')" required autofocus autocomplete="name" /> <x-input-error :messages="$errors->get('name')" class="mt-2" /></div>See that 'Name' parameter? It’s not the auth.register.name key anymore, right? This is exactly the difference: the keys of JSON files are in a human-readable form.
So, even if Laravel doesn’t find the key or the translation file – it will still display Name in our UI because that’s the key we passed to the __() helper function.
But if we add a translation file – it will be used instead:
resources/lang/en.json
{ "Name": "Your Name"}This allows us to write complete text in the __() function key and not worry about a path or missing translations.
Benefits of .json Files
- You can write full sentences as a key and later have them translated.
- Passing these files to a non-dev translator is much easier: they don’t need to worry about technical details.
- Using the same key in multiple views will result in the same translation. For example:
__('Name')inauth/register.blade.phpandauth/login.blade.phpwill result in the same translation.
Drawbacks of .json Files
- You can’t have nested keys. This means that all your text will be in a single file and a single layer. It’s not possible to write
__('auth.Name')and have a JSON file with theauthkey andNamekey inside of it. But you can have"auth.Name": "Name"in the same file which will load. This is not ideal, and you should only use it to translate the default Laravel translations as seen here - You will not be able to have context for the translation. For example:
__('Name')inauth/register.blade.phpandauth/login.blade.phpwill result in the same translation. If different languages require different translations for the same word in different contexts – you won’t be able to do that. - Your translation file will be huge. If you have a lot of translation strings – you’ll end up with a huge JSON file. This can be a problem if you have a lot of languages, and you need to translate the same string in all of them.
- You can’t write comments in the
.jsonfiles.
Which Should You Pick?
This is not a simple question to answer. The good thing is that they are pretty much interchangeable. With some caveats, of course.
You can move from .php files to .json files relatively easily. Moving from .json files to .php files is a bit more complicated as you will need to change all your keys to paths.
But it does not matter that much which one you will pick. As long as you are consistent – you can use either one or combine them.
Notice: Problems When Mixing JSON and PHP Files
Using both .php and .json files could lead you to a problem where you have a key in JSON that matches the filename in PHP. For example:
resources/lang/en/auth.php
return [ 'name' => 'Name', 'failed' => 'These credentials do not match our records.', 'password' => 'The provided password is incorrect.', 'throttle' => 'Too many login attempts. Please try again in :seconds seconds.',];resources/lang/en.json
{ "Auth": "Authentication"}Let’s call the __() helper function with a key of Auth anywhere in our view template:
resources/views/auth/register.blade.php
{{ __('Auth') }}Running this will result in an error:
Let’s dump the __('Auth') function to see what’s going on:
As you can see, we got the content of the default /lang/en/auth.php file and not our expected string of Authentication.
This is because the __() helper function will first look for a translation file with the same name as the key. If it finds it – it will return the whole file. If it doesn’t find it – it will look for a translation string in the lang/en.json file.
trans() VS __(): Which To Use?
You might have noticed that some people prefer __() over trans() and that’s okay. But have you ever looked at what the difference is?
__() is a helper function that calls the trans() function under the hood:
vendor/laravel/framework/src/Illuminate/Foundation/helpers.php
if (! function_exists('__')) { /** * Translate the given message. * * @param string|null $key * @param array $replace * @param string|null $locale * @return string|array|null */ function __($key = null, $replace = [], $locale = null) { if (is_null($key)) { return $key; } return trans($key, $replace, $locale); }}The biggest difference here is what happens if you pass no value to __():
__()will returnnull.trans()will return theIlluminate\Translation\Translatorinstance. This allows you to chain more methods on it. For example,trans()->getLocale()will return the current locale.
So which should we use? It’s up to you! I prefer __() for translation strings and trans() for other cases (like getting current locale, settings, etc).
In the next lesson, we’ll work with locales and how to tell Laravel which is your primary language.
When you show a translation string, Laravel needs to know what language to load, right? In tech terms, it’s called “locale”, and each Laravel project has the primary and the fallback locales.
In this lesson, we’ll cover how to set them.
Setting The Locale
To set the default locale is simple – just open the config/app.php and modify the locale key:
config/app.php
'locale' => 'es',// Or any other shortcode.// It has to match with the `lang/FOLDER` folder name// or the `lang/KEY.json` name.This will be your application’s default language for all users. Don’t leave it as en if you are building an application with a different language.
Setting The Fallback Locale
In this example, we’ve set our application to use es as a default language, but it’s missing some translations:
Translations will return the full key by default unless you set a fallback locale:
config/app.php
'fallback_locale' => 'en',Then it will take the fallback language and load its text:
lang/en/auth.php
return [ // ... 'register' => 'Registration',];Which will result in the following:
Now we see that Register is used instead of the key. While this is not perfect because it’s not in Spanish, it’s better than showing the key to the user.
JSON Translations are Different
Now here’s the catch for JSON file-based translations. They don’t really have a fallback as you would expect. It will not go to the fallback language, rather it will just display the key output.
In the same scenario, I’ve used JSON files instead of .php files for translations and fallback did nothing. Here’s what it did:
Changed the text to Registration:
lang/en.json
{ "Register": "Registration"}Configured the locale and fallback locale:
config/app.php
'locale' => 'es','fallback_locale' => 'en',But this still displays Register instead of Registration that’s defined in en language:

This is because JSON tried to look for a translated value in the es.json file, but it didn’t find it. So it just displayed the key.
To illustrate this even more, let’s say we are trying to look for:
<a href="{{ route('register') }}" class="ml-4 font-semibold text-gray-600 hover:text-gray-900 dark:text-gray-400 dark:hover:text-white focus:outline focus:outline-2 focus:rounded-sm focus:outline-red-500"> {{ __('Register to Join our Community') }}</a>And we have a translation for this in en.json:
lang/en.json
{ "Register to Join our Community": "Sign up to join our community"}What do you think the output will be? "Sign up to join our community" or "Register to Join our Community". Since we have a translation fallback – we’d expect the Sign up... to be displayed. But it displays this:

We did not get what we expected as JSON doesn’t look for fallback language or at least it doesn’t do it in the same way as PHP files do.
Setting the Locale Dynamically in Code
For multi-language projects, the locale should be set by user preference or URL. Then we should use this code:
use Illuminate\Support\Facades\App;// ...if(! in_array($locale, ['en', 'es'])) { abort(404);}App::setLocale($locale);// ...You would ask, where to place it?
This can be placed anywhere, but in my experience, it’s best to place it in Middleware. We will cover a practical example of this later, in our lesson about UI-based Language switching.
In general, as soon as you start working with multi-language applications – you need to pick one language as your primary source of truth. This should become your fallback language. It will help you spot missing translations and will prevent users from seeing random translation keys.
Typically, the actual translating process is performed by external non-dev people, right?
But the developer’s role here is to prepare all the structure well and to give clear instructions to the translator. In this and a few upcoming lessons, let’s discuss how can we perform our part of the process.
Translating JSON Files
In our application we’ll most likely have 1 JSON file per language:
lang/en.json
{ "Dashboard": "Dashboard", "Log in": "Log in", "Register": "Register", "You're logged in!": "You're logged in!", // ...}So, you send this file to the translator, with these instructions:
- Translate the right side of the
:to the target language. - Make sure the key on the left side of the
:is not changed. - Make sure that the file structure is not changed.
I like this approach for site-wide translations, because it’s easy to understand, and it’s easy to translate. You instantly see the whole context of the translation.
Translating PHP Files
Our application currently has these files (we’ve ignored default files):
lang/en/auth.php
return [ 'failed' => 'These credentials do not match our records.', 'password' => 'The provided password is incorrect.', 'throttle' => 'Too many login attempts. Please try again in :seconds seconds.', 'register' => 'Registration', // ...];lang/en/general.php
return [ 'dashboard' => 'Dashboard', 'youAreLoggedIn' => 'You are logged in!', 'cancel' => 'Cancel', 'saved' => 'Saved.', 'save' => 'Save', 'confirm' => 'Confirm',];As you can see, there are two separate files right now. Both of them have to be sent to our translator, with these instructions:
- Translate the text that’s on the right side of the
=>sign. - Keep the keys on the left side of the
=>sign the same. - Make sure to keep the same structure of the file.
- Add
\before'sign if it’s in the text.
Imagine giving this set of instructions to a person who doesn’t know anything about programming. It’s not easy, right?
It’s even harder if you have a lot of files (for example validation files) and a lot of text to translate.
You also may have an issue where the translator wouldn’t understand the meaning or intention of the key, as it’s not quite clear what the context is. You might have more specific keys but that doesn’t help much.
Package to Translate Core Laravel Files
You might have noticed that we didn’t talk about the core Laravel translation files, such as lang/en/validation.php. That’s because you don’t usually have to translate them yourself.
There’s an awesome community-built translation repository: Laravel-Lang/lang
They have a full package that adds some commands to your project:
- Install the package:
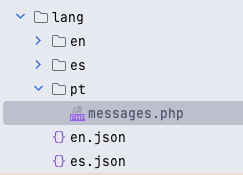
composer require laravel-lang/common --dev - Run
php artisan lang:add esto install the language files fores(Spanish). - This will add the files to your project:

That’s it! You now have the Spanish language files installed in your project. You can extend this by adding any additional keys that you might have in your project.
You can also copy files manually if you wish:
- Find the language you need, for example,
es: https://github.com/Laravel-Lang/lang/tree/main/locales/es - Open the
json.jsonfile and copy its contents of it. - Create a new file in your project:
lang/es.json - Paste the contents of the
json.jsonfile into your new file.
That’s it. You should be good to go.
Bonus “Trick”: Ask AI to Translate Text
Heard of ChatGPT yet?
So yeah, you may not need an external translator. If given a correct set of rules, AI can perform the translation for us!
While it’s definitely not perfect, it’s a good example of how AI could help you translate text one day!
Notice: Each ChatGPT run gave us a different translation for some text, so you’d have to manually fix them or have someone review them.
In Laravel, majority of validation error messages are good enough:
However, if you change the label, the validation message does not match the label:
Let’s see how we can fix this.
Label and Field Name Mismatch – Translated Form Attributes
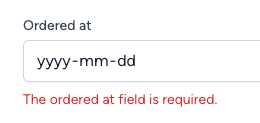
As the application grows, you’ll have cases where the field name and label do not match. For example, I have a field called Order Date on the UI but the form has an ordered_at name:
Blade form
<div class="mt-4"> <x-input-label for="ordered_at" :value="__('Order date')"/> <x-text-input id="ordered_at" class="block mt-1 w-full" type="date" name="ordered_at" :value="old('ordered_at')"/> <x-input-error :messages="$errors->get('ordered_at')" class="mt-2"/></div>This will result in the following validation message:
The ordered at field is required.
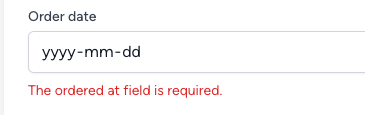
It is not that user-friendly as our name is Order date. Let’s fix this by adding the attributes method to our Form Request class:
Form Request Class
use Illuminate\Foundation\Http\FormRequest;class StoreOrderRequest extends FormRequest{ public function rules(): array { return [ 'ordered_at' => ['required', 'date'], // ... ]; } // ... public function attributes(): array { return [ 'ordered_at' => 'order date', ]; }}With this, we’ve told that once we have a field named ordered_at – its visual representation should be order date. This will result in the following validation message:
The order date field is required.
To go even further, we can use a translation here:
Form Request Class
// ...public function attributes(): array{ return [ 'ordered_at' => __('Order date'), ];}This will result in: The Order date field is required. – matching the label.
Validating Array of Fields
This one is tricky. You might see something like The field.0 is required. which is not very user-friendly. Let’s see how we can fix this.
We will have a form with multiple fields:
And the following validation rules:
Form Request Class
class StoreOrderRequest extends FormRequest{ public function rules(): array { return [ 'user_id' => ['required', 'integer'], 'ordered_at' => ['required', 'date'], 'complete' => ['required'], 'products' => ['required', 'array'], 'products.*.name' => ['required', 'string'], 'products.*.quantity' => ['required', 'integer'], ]; }}We try to validate the products array and make sure that we have name and quantity fields. If we try to submit this form without any products – we’ll see the following validation message:
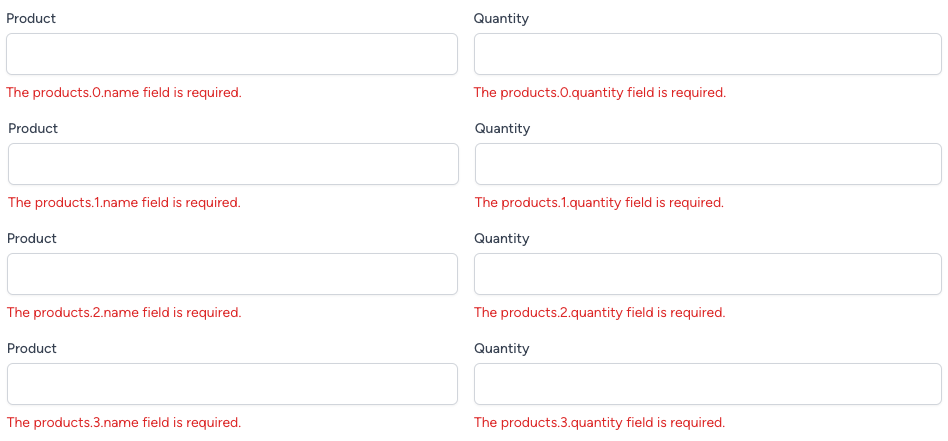
And it doesn’t look nice. We can fix this by adding the attributes method to our request class, with a * sign:
Form Request Class
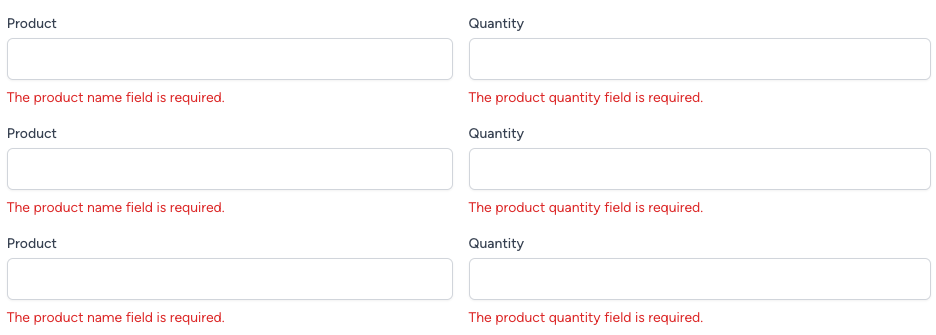
class StoreOrderRequest extends FormRequest{ public function rules(): array { return [ 'user_id' => ['required', 'integer'], 'ordered_at' => ['required', 'date'], 'complete' => ['required'], 'products' => ['required', 'array'], 'products.*.name' => ['required', 'string'], 'products.*.quantity' => ['required', 'integer'], ]; } public function attributes(): array { return [ 'products.*.name' => __('product name'), 'products.*.quantity' => __('product quantity') ]; }}As you can see, we’ve set the following:
products.*.name–product nameproducts.*.quantity–product quantity
And now submitting the form without any products will result in the following validation message:
Much better! But there’s more we can do. We can use the index of the array to make the message even more user-friendly. Let’s see how:
Form Request Class
public function attributes(): array{ return [ 'products.*.name' => __('product :index name'), 'products.*.quantity' => __('product :index quantity') ];}Note that we’ve used :index in our text. This is a special placeholder that will be replaced with the index of the array. So if we have 3 products – we’ll see the following validation message:
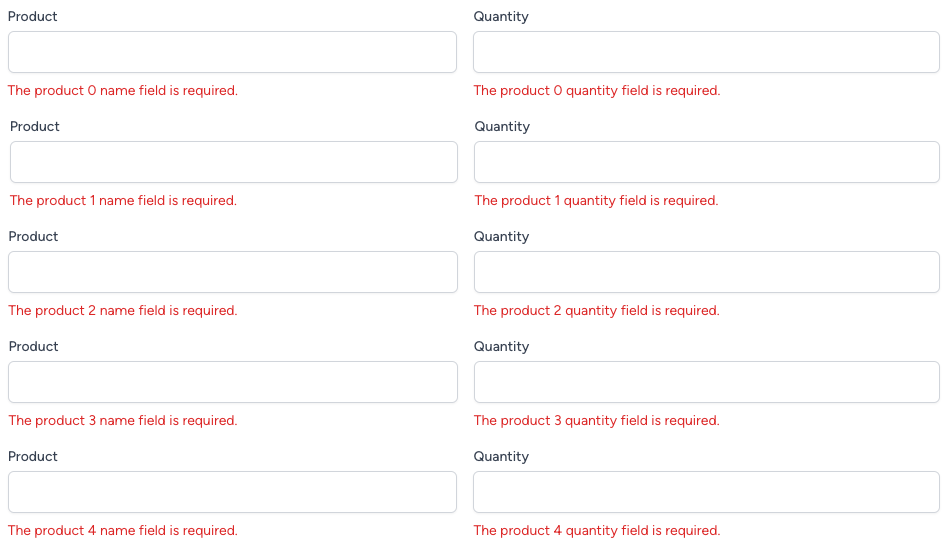
While it’s not perfect in our scenario – it’s a great example of how flexible this can be. To make sure that we don’t display 0 as the index (not everyone is a developer and counts from 0!) we could actually use :position instead of :index:
Form Request Class
public function attributes(): array{ return [ 'products.*.name' => __('product :position name'), 'products.*.quantity' => __('product :position quantity') ];}Which will result in the following validation message:
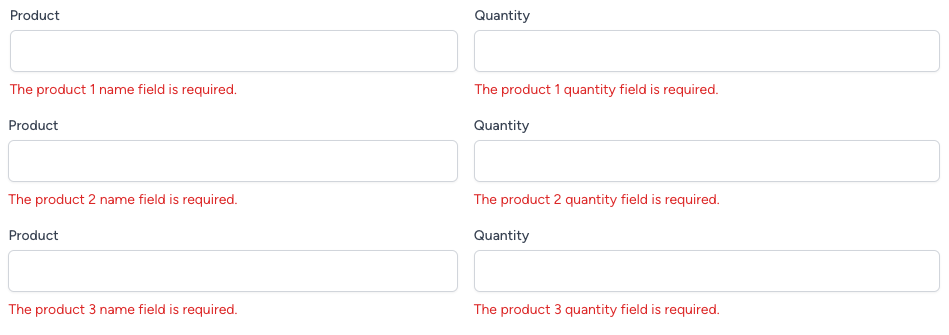
This is way nicer, especially if you are displaying messages at the top of the form!
Using Custom Validation Messages
Another great feature of Laravel is the ability to use custom validation messages. This is especially useful when you have a lot of fields, and you want to have a custom message for each field. Let’s see how we can do this.
We will use the messages method to define our custom messages:
Form Request Class
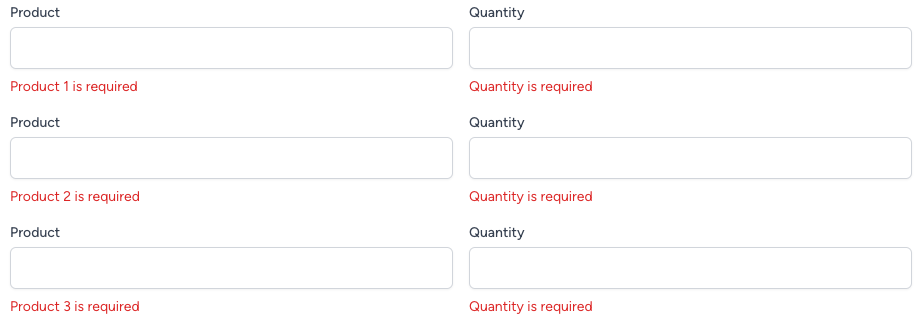
class StoreOrderRequest extends FormRequest{ public function rules(): array { return [ 'user_id' => ['required', 'integer'], 'ordered_at' => ['required', 'date'], 'complete' => ['required'], 'products' => ['required', 'array'], 'products.*.name' => ['required', 'string'], 'products.*.quantity' => ['required', 'integer'], ]; } public function messages() { return [ 'products.*.name.required' => __('Product :position is required'), 'products.*.quantity.required' => __('Quantity is required'), ]; }}Once we’ve defined our custom messages – we can submit the form without any products, and we’ll see the following validation message:
Why did that happen? Let’s dive a little deeper at the messages method:
- Our
keyis the field name that we want to validate + the validation rule that we want to validate. In our case, we want to validate theproducts.*.namefield with therequiredrule. - Our
valueis the message that we want to display. In our case, we want to display theProduct :position is requiredmessage.
You don’t have to use :position placeholder here. You can use any text that you want. By default, the message would look like this:
The :attribute field is required.
Let’s add another example to our messages method – changing the message for the products.*.quantity field:
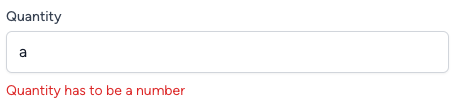
Request Class
public function messages(){ return [ 'products.*.name.required' => __('Product :position is required'), 'products.*.quantity.required' => __('Quantity is required'), 'products.*.quantity.integer' => __('Quantity has to be a number'), ];}Now if we submit the form with a quantity that is not a number – we’ll see the following validation message:
Repository: https://github.com/laraveldaily/laravel-localization-course/tree/lesson/complex-forms-validation
Have you ever needed counting specific items, with translations?


A typical code would be:
<div class=""> @if($messagesCount === 0) <span>You have no new messages</span> @elseif($messagesCount === 1) <span>You have 1 new message</span> @else <span>You have {{ $messagesCount }} new messages</span> @endif</div>To avoid these if conditions, you can use the Laravel localization pluralization feature.
Using trans_choice() Helper
Laravel comes with a really great helper function called trans_choice(). This function allows us to use a string that contains multiple translations, and it will choose the correct one based on the number we pass to it.
The rules:
- Use the
|character to separate the different count options. - Use the
:countto get the number we passed to the function. - Use
{INT}to specify for which number we want to use this translation. - Use
[INT,*]to specify for which number we want to use this translation, and all the numbers after it.
Example:
{0} You have no new messages|{1} You have 1 new message|[2,*] You have :count new messages
{0} You have no new messages– This will be used when the number is 0.{1} You have 1 new message– This will be used when the number is 1.[2,*] You have :count new messages– This will be used when the number is 2 or more.
And all we have to do is call the trans_choice() with a key to our translation and count of some object (it can be a Countable object or a number).
Here are examples in both JSON and PHP:
Pluralization in JSON
JSON has support for this, but it’s not that clean. Let’s take a look:
lang/en.json
{ "{0} You have no new messages|{1} You have 1 new message|[2,*] You have :count new messages": "{0} You have no new messages|{1} You have 1 new message|[2,*] You have :count new messages"}In our blade we can use the following code:
View
{{ trans_choice('{0} You have no new messages|{1} You have 1 new message|[2,*] You have :count new messages', $messagesCount) }}Bonus: There’s also a Blade helper when working directly with Blade files – @choice() which does exactly the same:
{{ @choice('{0} You have no new messages|{1} You have 1 new message|[2,*] You have :count new messages', $messagesCount) }}And it will react to the number of messages we have. But this requires us to write the same string in JSON and in our blade which is not very clean.
Pluralization in PHP
PHP has a better way to do this, and it’s using the @choice directive. Let’s take a look:
lang/en/messages.php
return [ 'newMessageIndicator' => '{0} You have no new messages|{1} You have 1 new message|[2,*] You have :count new messages',];And now using it in the blade can look much nicer as we won’t have to re-type the whole condition:
View
{{ trans_choice('messages.newMessageIndicator', $messagesCount) }}OR
View
@choice('messages.newMessageIndicator', $messagesCount)See how much cleaner this is? We have a specific key to a message, and we can use it in multiple places without having to re-type the whole condition as we did in the JSON example.
Translating all the months and currency names manually yourself would be a lot of work. Luckily, in Laravel we can use PHP packages to help with this!

Localizing Dates
Localizing dates with Carbon is really easy. All you need to do is to set the locale of the Carbon instance to the current locale. This can be done in the AppServiceProvider:
app/Providers/AppServiceProvider.php
use Carbon\Carbon;class AppServiceProvider extends ServiceProvider{ public function boot() { // ... Carbon::setLocale(app()->getLocale()); //... }}Now, when you use Carbon in your views, it will automatically use the correct locale:
resources/views/welcome.blade.php
{{ now()->isoFormat('dddd, D MMMM YYYY') }}Which will output:
- English:
Monday, 3 April 2023 - Spanish:
lunes, 3 abril 2023 - German:
Montag, 3 April 2023 - etc.
It’s as easy as that – no need to translate all the months yourself!
Localizing Date Differences
You can also localize the difference between the two dates, in a human-readable format. For example, if you want to show how long ago a post was created, you can use the diffForHumans method:
Controller
$start = now()->subMinutes(56)->subSeconds(33)->subHour();$end = now();$difference = $end->longRelativeDiffForHumans($start, 5);dd($difference);Which will output:
- English –
1 hour 56 minutes 33 seconds after - Spanish –
1 hora 56 minutos 33 segundos después - German –
1 Stunde 56 Minuten 33 Sekunden später - And so on…
Localizing Currency
This one is tricky: different countries have different placement of the currency symbol, different decimal separators, and different thousand separators. Luckily, PHP has a NumberFormatter class that can help us with this.
Notice: this is a native PHP function but you might need to enable an intl extension!. This extension is not enabled by default in PHP, so you need to enable it in your php.ini file.
Once you have it enabled, you can use the NumberFormatter class to format a number:
Controller
$formatter = new NumberFormatter('en_US', NumberFormatter::CURRENCY);dd($formatter->formatCurrency(35578.883, 'USD'));This function takes two parameters: the number to format and the currency code. The currency code is used to determine the currency symbol. Let’s take a look at different cases:
If we look at USD this will output:
- With format
en_US:$35,578.88 - With format
es:35.578,88 $US - With format
de:35.578,88 $ - With format
en_GB:US$35,578.88 - etc.
And if we switch to GBP:
Controller
$fmt = new NumberFormatter('en_US', NumberFormatter::CURRENCY);dd($fmt->formatCurrency(35578.883, 'GBP'));This is the output:
- With format
en_US:£35,578.88 - With format
es:35.578,88 GBP - With format
de:35.578,88 £ - With format
en_GB:£35,578.88 - etc.
This is great as we didn’t have to add the currency symbol into the correct place ourselves. Nor we had to use commas or dots as decimal separators. The NumberFormatter class did all of that for us!
Use NumberFormatter as a Helper
You can also create a helper function to use in your views/system:
app/helpers.php
if(! function_exists('formatCurrency')) { function formatCurrency($amount, $locale = 'en_US', $currency = 'USD') { $formatter = new NumberFormatter($locale, NumberFormatter::CURRENCY); return $formatter->formatCurrency($amount, $currency); }}And in your view, you can use it like this:
{{ formatCurrency(35578.883) }}This will output:
$35,578.88
Adding a language selector is crucial to any multilingual application. In this practical example, we’ll add a language selector to our navigation bar:

In this first example, we will define the language from the URL segment, like /en/about or /es/register.
Setup
Here’s our plan to set up a language selector:
- Configuration: add a language list to the config – this will be used to display the language selector
- Middleware: Add a Middleware to handle language change and URL redirection
- Routes: Modify Routes to use the Middleware
- Views: Add a language selector to our Views
- Redirects: Modify our redirects for authentication
Let’s start with the configuration:
config/app.php
// ...'locale' => 'en', // <-- Locate this line and add `available_locales` below it'available_locales' => [ 'en', 'es',],// ...Next, we can create our middleware:
php artisan make:middleware SetLocaleapp/Http/Middleware/SetLocale.php
use URL;use Carbon\Carbon;// ...public function handle(Request $request, Closure $next): Response{ app()->setLocale($request->segment(1)); // <-- Set the application locale Carbon::setLocale($request->segment(1)); // <-- Set the Carbon locale URL::defaults(['locale' => $request->segment(1)]); // <-- Set the URL defaults // (for named routes we won't have to specify the locale each time!) return $next($request);}Now we need to register the Middleware in the app/Http/Kernel.php file:
app/Http/Kernel.php
// ...protected $middlewareAliases = [ // ... 'setlocale' => \App\Http\Middleware\SetLocale::class,];// ...Now we need to modify Routes to use the new Middleware and add the locale segment to the URL:
routes/web.php
Route::get('/', function () { return redirect(app()->getLocale()); // <-- Handles redirect with no locale to the current locale});Route::prefix('{locale}') // <-- Add the locale segment to the URL ->where(['locale' => '[a-zA-Z]{2}']) // <-- Add a regex to validate the locale ->middleware('setlocale') // <-- Add the middleware ->group(function () { Route::get('/', function () { return view('welcome'); }); Route::get('/dashboard', function () { return view('dashboard'); })->middleware(['auth', 'verified'])->name('dashboard'); Route::middleware('auth')->group(function () { Route::get('/profile', [ProfileController::class, 'edit'])->name('profile.edit'); Route::patch('/profile', [ProfileController::class, 'update'])->name('profile.update'); Route::delete('/profile', [ProfileController::class, 'destroy'])->name('profile.destroy'); // ... }); require __DIR__ . '/auth.php';});Now we can add the language selector to our views:
resources/views/layouts/navigation.blade.php
{{-- ... --}}@foreach(config('app.available_locales') as $locale) <x-nav-link :href="route(\Illuminate\Support\Facades\Route::currentRouteName(), ['locale' => $locale])" :active="app()->getLocale() == $locale"> {{ strtoupper($locale) }} </x-nav-link>@endforeach<x-dropdown align="right" width="48">{{-- ... --}}And fix one issue with our Dashboard link:
resources/views/welcome.blade.php
Replace: {{ url('/dashboard') }} with {{ route('dashboard') }}
Finally, we need to modify our redirects for authentication:
Redirect after login:
app/Http/Controllers/Auth/AuthenticatedSessionController.php
public function store(LoginRequest $request): RedirectResponse{ $request->authenticate(); $request->session()->regenerate(); return redirect()->intended(app()->getLocale() . RouteServiceProvider::HOME);}Redirect after the user session expired:
app/Http/Middleware/Authenticate.php
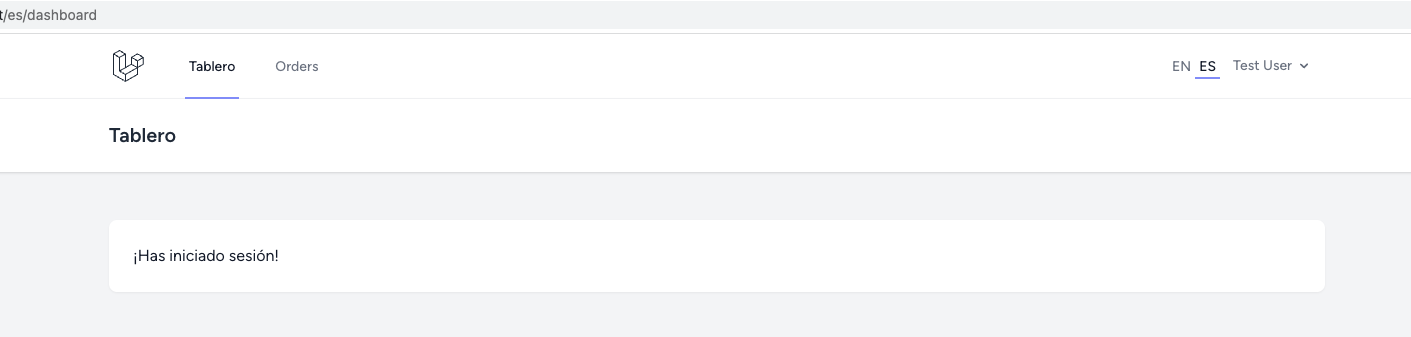
protected function redirectTo(Request $request): ?string{ return $request->expectsJson() ? null : route('login', ['locale' => app()->getLocale()]);}That is it, we are done! Once the page is loaded – we should see that we were redirected from / to /en and once the user logs in – we should be redirected to /en/dashboard:
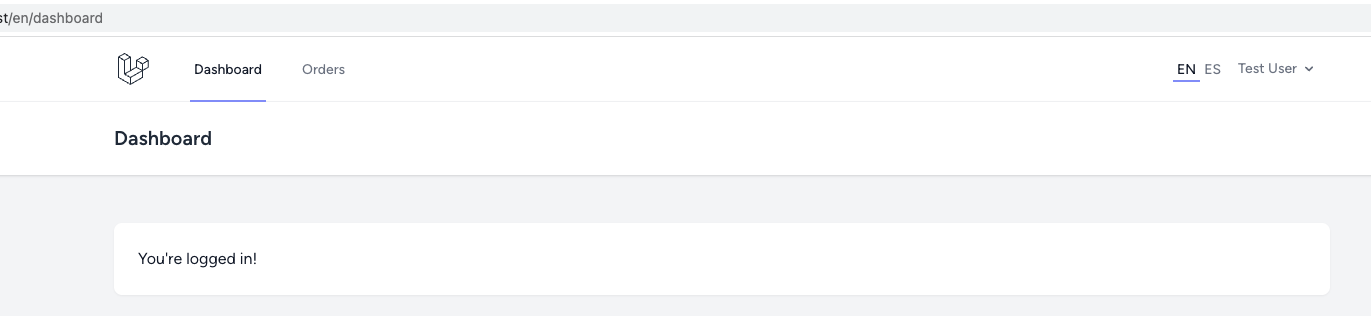
And switching between languages should work as expected:
Repository: https://github.com/LaravelDaily/laravel-localization-course/tree/lesson/ui-switching
Another example of how we can add a language selector to our application is by using sessions and a DB table to store the user’s preferred language.
This example will not use a URL to determine the language which will allow us to use the same URL for all languages.
Setup
Our setup process for Database stored language selection will touch these things:
- Configuration: Adding a language list to our configuration – this will be used to display the language selector
- DB Structure: Creating a new field on the
userstable calledlanguage - Controller: Create a controller that will handle the language change
- Middleware: Add a middleware to handle language settings based on user’s preferences
- Views: Adding a language selector to our views
- Routes: Adding a route that will allow us to change the language
Let’s start with the configuration:
config/app.php
// ...'locale' => 'en', // <-- Locate this line and add `available_locales` below it'available_locales' => [ 'en', 'es',],// ...Now we need to add a new field to our users table:
php artisan make:migration add_language_to_users_tableMigration
Schema::table('users', function (Blueprint $table) { $table->string('language')->default('en');});app/Models/User.php
protected $fillable = [ // ... 'language'];Let’s make a Controller that will switch user’s language and save it to remember it for the next time:
app/Http/Controllers/ChangeLanguageController.php
public function __invoke($locale){ // Check if the locale is available and valid if (!in_array($locale, config('app.available_locales'))) { return redirect()->back(); } if (Auth::check()) { // Update the user's language preference in the database Auth::user()->update(['language' => $locale]); } else { // Set the language in the session for guests session()->put('locale', $locale); } // Redirect back to the previous page return redirect()->back();}Now we can create our Middleware:
php artisan make:middleware SetLocaleapp/Http/Middleware/SetLocale.php
use Auth;use Carbon\Carbon;// ... public function handle(Request $request, Closure $next): Response{ // Logged-in users use their own language preference if (Auth::check()) { app()->setLocale(Auth::user()->language); Carbon::setLocale(Auth::user()->language); // Guests use the language set in the session } else { app()->setLocale(session('locale', 'en')); Carbon::setLocale(session('locale', 'en')); } return $next($request);}Register our middleware in our app/Http/Kernel.php file:
app/Http/Kernel.php
// ...protected $middlewareAliases = [ // ... 'setlocale' => \App\Http\Middleware\SetLocale::class,];// ...Display the language selector in our views:
resources/views/layouts/navigation.blade.php
{{-- ... --}}@foreach(config('app.available_locales') as $locale) <x-nav-link :href="route('change-locale', $locale)" :active="app()->getLocale() == $locale"> {{ strtoupper($locale) }} </x-nav-link>@endforeach<x-dropdown align="right" width="48">{{-- ... --}}And lastly, we need to modify our routes to use our Middleware and contain an endpoint to change the language:
routes/web.php
use App\Http\Controllers\ChangeLanguageController;// ...// Our language change endpointRoute::get('lang/{locale}', ChangeLanguageController::class)->name('change-locale');Route::middleware('setlocale') // <-- Our middleware to set the language ->group(function () { Route::get('/', function () { return view('welcome'); }); Route::get('/dashboard', function () { return view('dashboard'); })->middleware(['auth', 'verified'])->name('dashboard'); Route::middleware('auth')->group(function () { Route::get('/profile', [ProfileController::class, 'edit'])->name('profile.edit'); Route::patch('/profile', [ProfileController::class, 'update'])->name('profile.update'); Route::delete('/profile', [ProfileController::class, 'destroy'])->name('profile.destroy'); // ... }); require __DIR__ . '/auth.php'; });That’s it! Now we can change the language by clicking on the language selector in the navigation bar and it will remember the language for our users indefinitely while guests will have their language set for the current session.
Transforming Guest Language to a User Language Preference
One additional step that we can take to improve the experience and avoid resetting the language for our new users is to take what they set in the session and transform it into a language preference in the database:
app/Http/Controllers/Auth/RegisteredUserController.php
// ...public function store(Request $request): RedirectResponse{ // ... $user = User::create([ 'name' => $request->name, 'email' => $request->email, 'password' => Hash::make($request->password), // Here we set the language preference to the language set in the session 'language' => session('locale', config('app.locale')), ]); // ...}// ...Repository: https://github.com/LaravelDaily/laravel-localization-course/tree/lesson/session-language-switching
This package allows you to use a database to store your translations. This is useful if you want to allow your users to edit translations.
It does not contain any UI, but it provides a model with which you can create your own UI. On top of that it is easy to extend and add more translation sources.
Installation
You can install the package via composer following official Spatie – Laravel Translation Loader documentation.
Usage
Package doesn’t need any special configuration. You can use the trans() helper as you normally would.
Notice: It does not work correctly with JSON files and __() helper.
What does it do?
Once you set up the package and try to use the trans() helper, it will first check if the translation exists in the database. If it does, it will return the translation from the database. If it doesn’t, it will return the translation from the language files. This allows you to build a translation editor in your application and use:
How to Create Translations
To create new translations in your database – this package provides a model LanguageLine:
use Spatie\TranslationLoader\LanguageLine;LanguageLine::create([ 'group' => 'validation', 'key' => 'required', 'text' => ['en' => 'This is a required field', 'nl' => 'Dit is een verplicht veld'],]);It accepts the following parameters:
group– the group of the translation (e.g.validationorauth)key– the key of the translation (e.g.requiredorfailed)text– an array of translations for each language (e.g.['en' => 'This is a required field', 'nl' => 'Dit is een verplicht veld'])
That’s it. Now if you call trans('validation.required') it will return the translation from the database.
What is it good for?
This package mainly helps you add different drivers for your translations. By default, it’s a database driver, but you can also use a .csv file by creating your own driver.
Repository: https://github.com/LaravelDaily/laravel-localization-course/tree/lesson/packages/spatie
We’ve covered the core string Localization, but there are more aspects that we can translate. For example, routes:
Take a look at the URL bar


In the images, you should see that the routes are translated as well. This is done by the mcamara/laravel-localization package.
This package helps you manage your routes in multiple languages. It also provides a great set of middlewares and helpers to help you with translations – such as detecting the user’s language and redirecting them to the correct route, translating routes, etc.
Installation
To install the package, there are quite a few steps. First, we need to install the package:
composer require mcamara/laravel-localizationThen, we need to publish the config file:
php artisan vendor:publish --provider="Mcamara\LaravelLocalization\LaravelLocalizationServiceProvider"And finally register the middleware in the app/Http/Kernel.php file:
app/Http/Kernel.php
protected $routeMiddleware = [ // ... 'localize' => \Mcamara\LaravelLocalization\Middleware\LaravelLocalizationRoutes::class, 'localizationRedirect' => \Mcamara\LaravelLocalization\Middleware\LaravelLocalizationRedirectFilter::class, 'localeSessionRedirect' => \Mcamara\LaravelLocalization\Middleware\LocaleSessionRedirect::class, 'localeCookieRedirect' => \Mcamara\LaravelLocalization\Middleware\LocaleCookieRedirect::class, 'localeViewPath' => \Mcamara\LaravelLocalization\Middleware\LaravelLocalizationViewPath::class];This way, we have everything we need to start translating!
Setting Up the Routes
To set our routes, we need to modify how they are defined a little bit by adding a parent group:
routes/web.php
Route::group([ 'prefix' => LaravelLocalization::setLocale(), 'middleware' => ['localeSessionRedirect', 'localizationRedirect']], function () { Route::get('/', function () { return view('welcome'); }); // ... require __DIR__ . '/auth.php';});This code will achieve the following:
- Prefix the routes with a locale (e.g.
/en/or/es/) - Redirect the user to the correct locale if they are not using it
Combined with default configuration values found in config/laravellocalization.php – it will also attempt to guess the user’s locale based on the browser’s settings.
Enabling Different Languages
To enable different languages, we need to modify the config/laravellocalization.php file:
config/laravellocalization.php
// ...'supportedLocales' => [ 'en' => ['name' => 'English', 'script' => 'Latn', 'native' => 'English', 'regional' => 'en_GB'], //'en-AU' => ['name' => 'Australian English', 'script' => 'Latn', 'native' => 'Australian English', 'regional' => 'en_AU'], //'en-GB' => ['name' => 'British English', 'script' => 'Latn', 'native' => 'British English', 'regional' => 'en_GB'], //'en-CA' => ['name' => 'Canadian English', 'script' => 'Latn', 'native' => 'Canadian English', 'regional' => 'en_CA'], //'en-US' => ['name' => 'U.S. English', 'script' => 'Latn', 'native' => 'U.S. English', 'regional' => 'en_US'], 'es' => ['name' => 'Spanish', 'script' => 'Latn', 'native' => 'español', 'regional' => 'es_ES'],],// ...Adding the Language Switcher
Lastly, we need to add a language switcher to our application. We can do this by adding a simple blade template:
resources/views/layouts/navigation.blade.php
{{-- ... --}}@foreach(LaravelLocalization::getSupportedLocales() as $localeCode => $properties) <x-nav-link rel="alternate" hreflang="{{ $localeCode }}" :active="$localeCode === app()->getLocale()" href="{{ LaravelLocalization::getLocalizedURL($localeCode, null, [], true) }}"> {{ ucfirst($properties['native']) }} </x-nav-link>@endforeach<x-dropdown align="right" width="48">{{-- ... --}}This will add a language switcher to the top of the page:

Fixing Route Caching
By default, the Mcmara package will not work with route caching. To fix this, we need to add a few lines to the RouteServiceProvider.php file:
app/Providers/RouteServiceProvider.php
// ...class RouteServiceProvider extends ServiceProvider{use \Mcamara\LaravelLocalization\Traits\LoadsTranslatedCachedRoutes;// ...And change the artisan command we use. Instead of php artisan route:cache we should use php artisan route:trans:cache.
Clearing route cache works with php artisan route:clear but it will leave some mess in the bootstrap/cache folder. To avoid it – we should also use the php artisan route:trans:clear command.
Displaying All Routes
Another command that differs while using this package is php artisan route:list. While it still works, it will only give you a base overview:
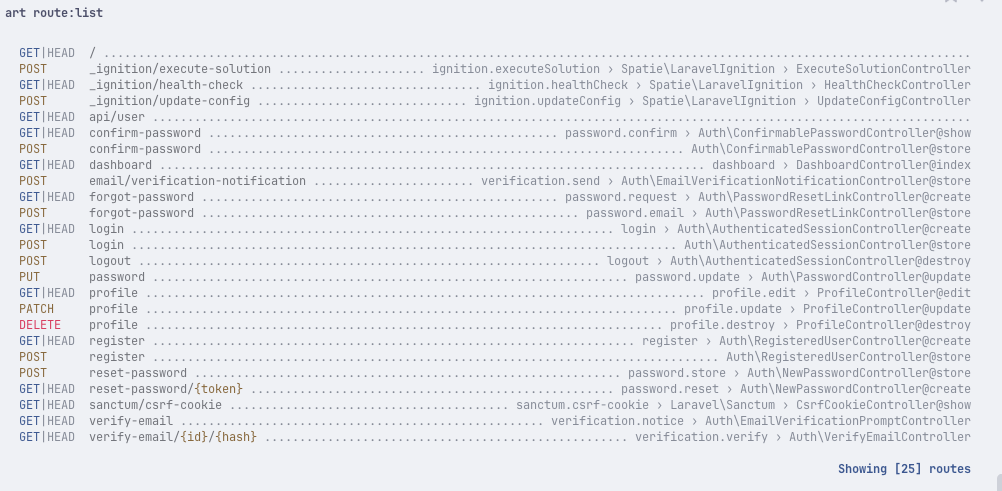
But if we use php artisan route:trans:list {locale} we will get a more detailed overview:
Extended Package Functionality
While we’ve covered the base package functionality to get your routes going – there are a few more things that you can do with the package.
- Show or hide the default locale in the URL
- Ignore specific routes
- Translating the routes
All of these require a bit more work, so let’s get started!
Showing or Hiding the Default Locale in URL
By default, the Mcmara package will show the default locale in the URL:
/en/dashboard /es/dashboard
This is not always desirable, so we can change this by modifying the config/laravellocalization.php file:
config/laravellocalization.php
// ...'hideDefaultLocaleInURL' => true,// ...After this change you’ll have the following URLs:
/dashboard /es/dashboard
Ignoring Specific Routes
There are cases where it doesn’t matter if the route is localized or not. For example, a route that checks for messages from a queue.
routes/web.php
Route::group([ 'prefix' => LaravelLocalization::setLocale(), 'middleware' => ['localeSessionRedirect', 'localizationRedirect']], function () { // ... Route::get('/queue-check', QueueCheckController)->name('queue.check'); // ...});Trying to load this page (or make a JSON request to it) will result in a URL change to:
/en/queue-check
Which might not be what we want. Even if we defined the route in a prefixed group – we can ignore the route by adding it to the config/laravellocalization.php file:
config/laravellocalization.php
// ...'urlsIgnored' => [ '/queue-check',],// ...And now it will not contain any locale prefix:
/queue-check
Translating the Routes
Another great extension to the package is the ability to translate the routes. This is especially useful if you want to have a different URL for the same page in different languages. For example, if you want to have a different URL for the dashboard page in Spanish:
/en/dashboard /es/panel
To achieve this, we need to modify the routes/web.php file and add a middleware:
routes/web.php
Route::group([ 'prefix' => LaravelLocalization::setLocale(), 'middleware' => ['localeSessionRedirect', 'localizationRedirect', 'localize'] // <- Add `localize` middleware], function () { // ...});This way, we told the system that we expect the routes to be translated. Now we need to add the translations to the resources/lang/{locale}/routes.php file:
resources/lang/en/routes.php
return [ 'dashboard' => 'dashboard',];And the translation for Spanish:
resources/lang/es/routes.php
return [ 'dashboard' => 'panel',];The last step before seeing it in action is to add the translated routes to the routes/web.php file by adding LaravelLocalization::transRoute('routes.dashboard') instead of the route path:
routes/web.php
Route::get(LaravelLocalization::transRoute('routes.dashboard'), [DashboardController::class, 'index'])->middleware(['auth', 'verified'])->name('dashboard');Once this is done, switching languages will switch the URL as well:
/en/dashboard /es/panel
Translated Routes Issues
While this is a great feature, there are a few issues with it. One of those is described in the package documentation – the POST method is not working with translated routes.
To fix this, you have to use the LaravelLocalization::localizeUrl($route) facade instead of the route() helper. So it might be best to translate only the GET routes.
Conclusion
This package is really versatile in terms of route localization control. Combining this with previously covered static text translation – you’ll definitely have a great time with your multilingual application.
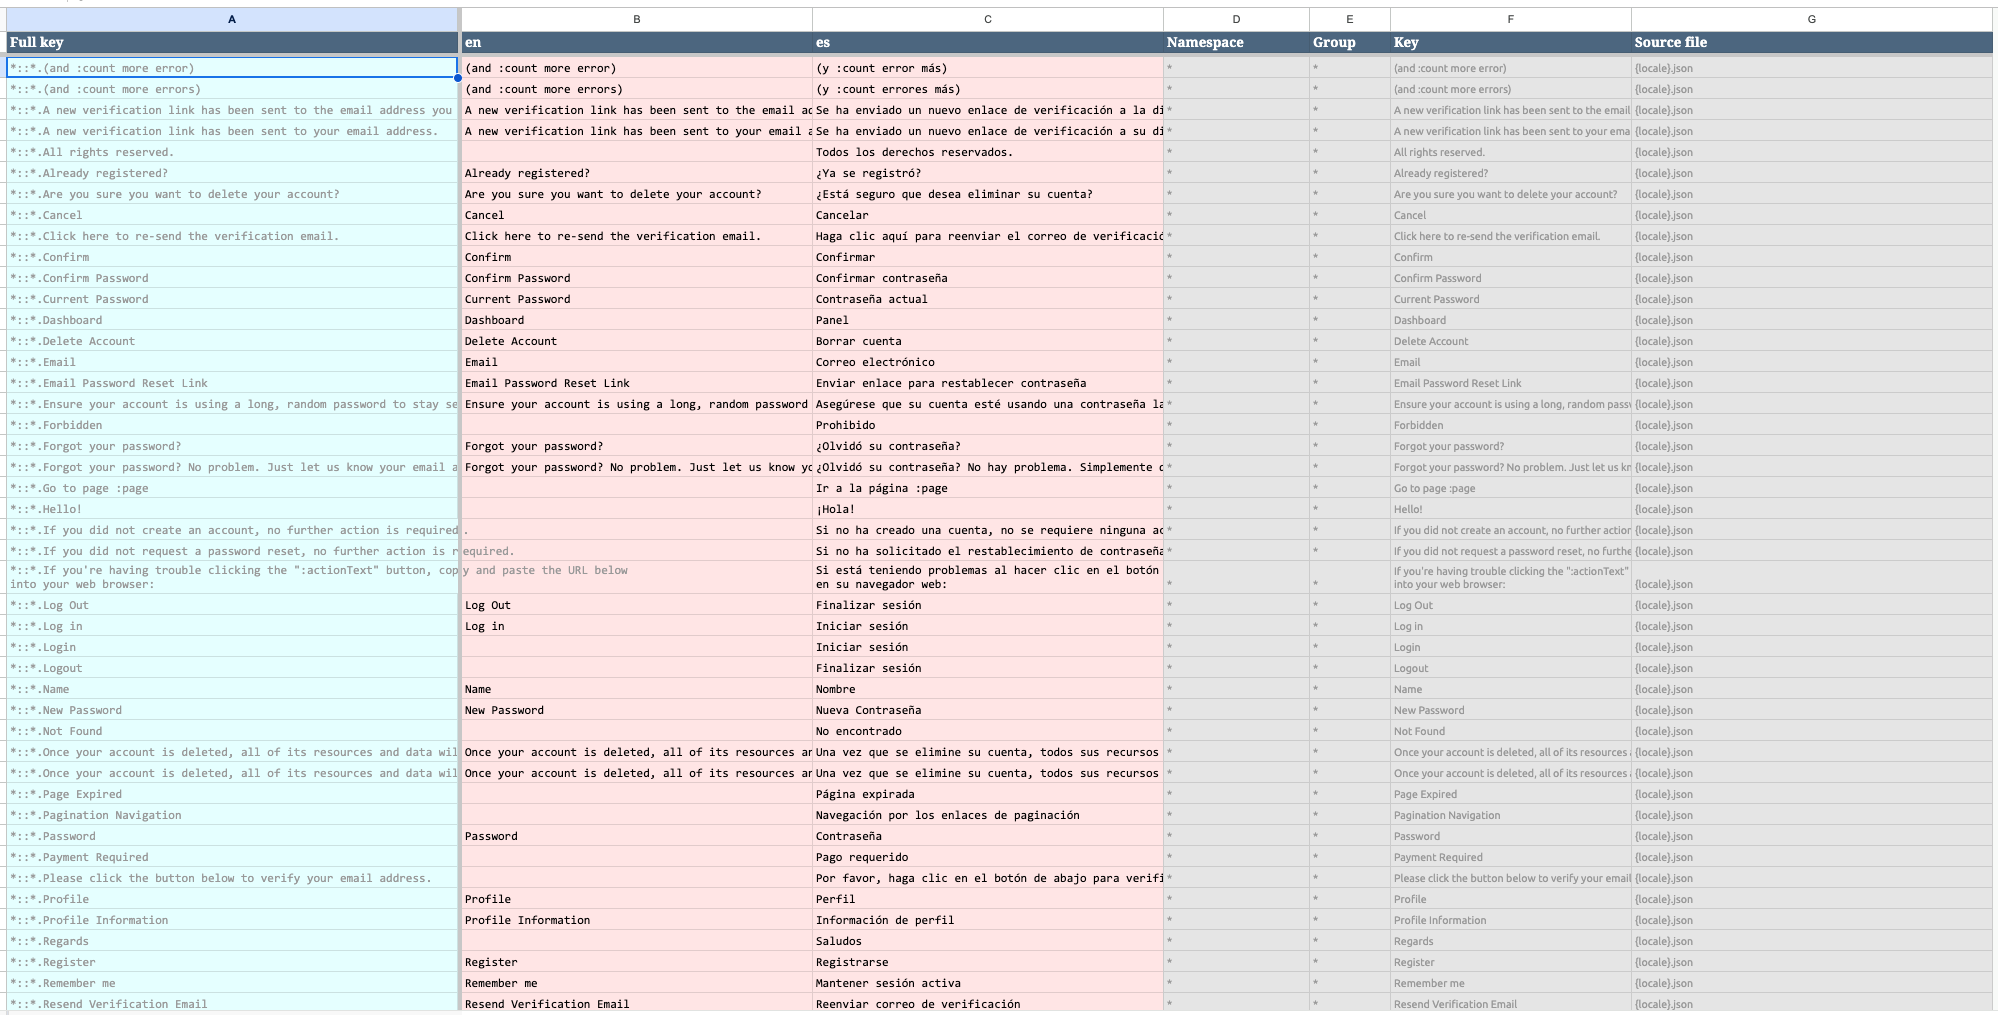
With this package you’ll be able to send a Google Sheets link to your customer (or translation team!) and they will be able to translate your app into a Google sheet. You can then import the translations back into your app.
It will look something like this:

Installation
If you look at the GitHub page – you’ll notice that the installation process is quite complex. But don’t worry, It’s not that hard!
Installing package via composer:
composer require nikaia/translation-sheet --devWe are installing this as –dev because it should not be used in production! It’s better to set up a process like GitHub Actions to do the sync
Publishing the config file:
php artisan vendor:publish --provider="Nikaia\TranslationSheet\TranslationSheetServiceProvider"And now for the big part – creating a service account in the Google Cloud Platform. The full well-written guide can be found on the GitHub page.
Usage
The usage of this package is quite simple. You just need to run the following command:
php artisan translation_sheet:setupThis will prepare the setup of the sheet (nothing will be pushed yet!). Next, we need to run the following command:
php artisan translation_sheet:prepareOnce again, it will not produce anything in the sheet yet, but it will scan your language files. To push the translations you need to run:
php artisan translation_sheet:pushAnd now if you open your sheet – you’ll see that it has been populated with the translations from your language files.
To pull the translations from the sheet you need to run:
php artisan translation_sheet:lockTo lock the file (so no one can edit it):
And pull the translations:
php artisan translation_sheet:pullThis will sync the translations from the sheet to your language files.
And finally, you can unlock the sheet:
php artisan translation_sheet:unlockThat’s it! You can now use this package to manage your translations in a Google Sheet.
Conclusion
This package works really well as a manager for your translations. It handles both JSON and PHP translation files and gives a nice overview to the end translator. There are not many optimizations needed, but you can always improve this process by using GitHub Actions (or any similar tool) to automate the sync.
Repository: https://github.com/LaravelDaily/laravel-localization-course/tree/lesson/packages/nikaia-translation-sheet
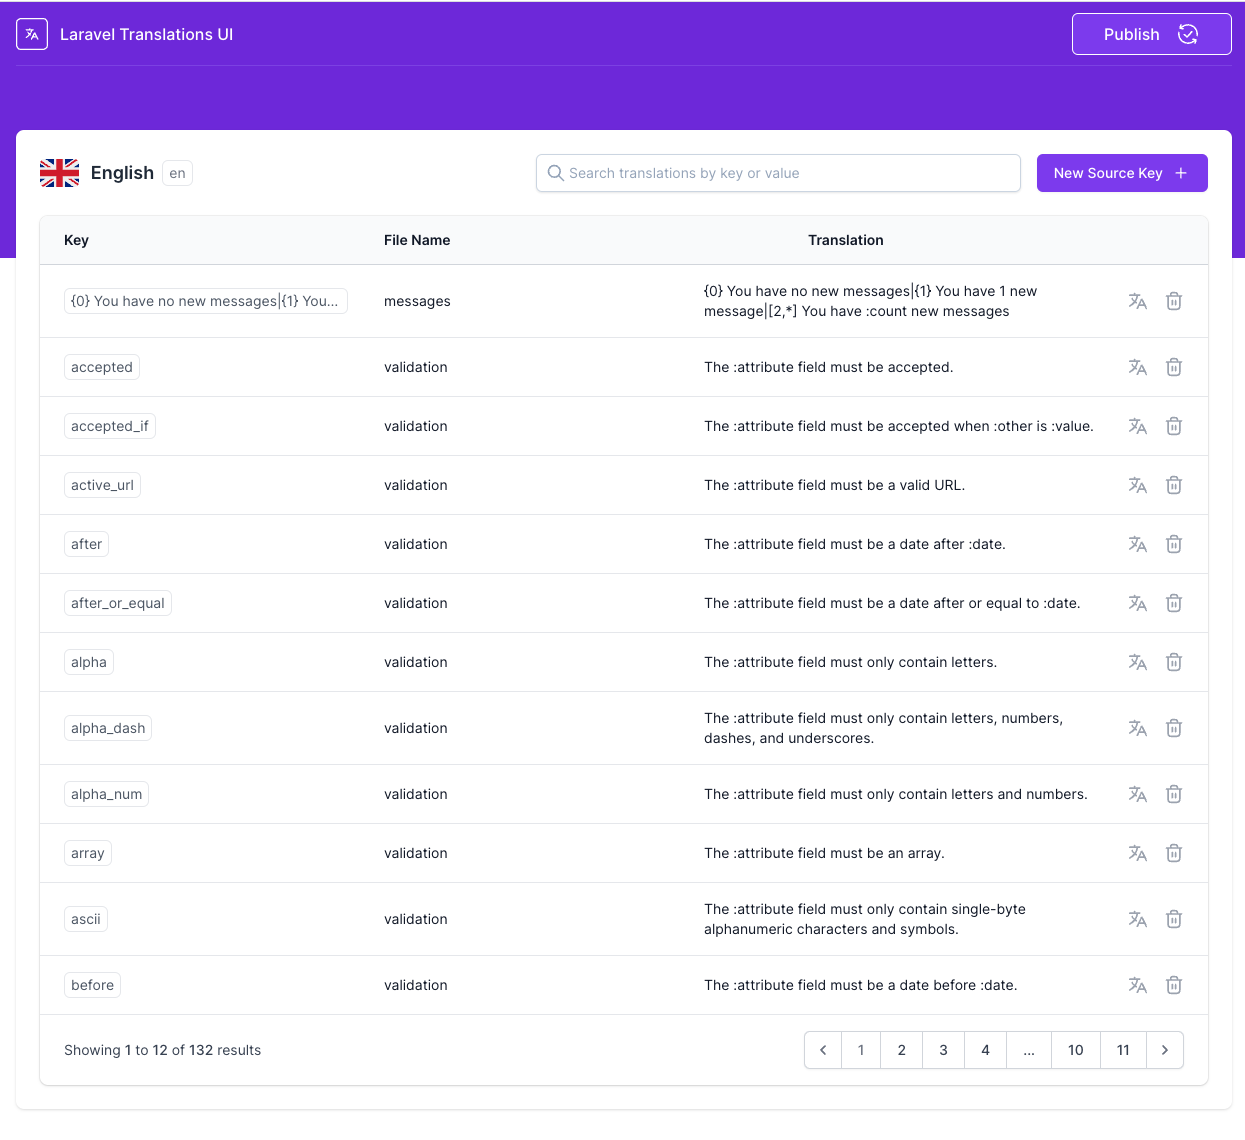
This package is a UI-based translations manager for your application:

Installation
Full installation guide can be found here but here is a quick summary:
Installing package via composer:
composer require outhebox/laravel-translationsPublishing package assets:
php artisan translations:installMigrating the database:
php artisan migrateImporting translations:
php artisan translations:importAnd now if you visit your-app.com/translations you should see the UI:
Package Features
There are a few things you can do with this package:
- Add new languages
- Manage translations per language
So let’s dive into those!
Adding New Languages
To add a new language, click on the New Language + button:

This will open a modal where you can add the language:
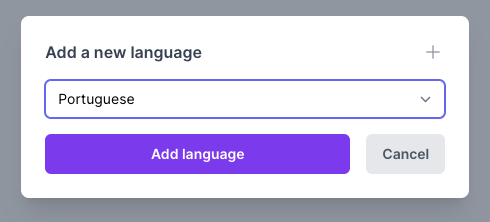
Once you click on Add Language the language will be added to the database, and you will see it on the list:
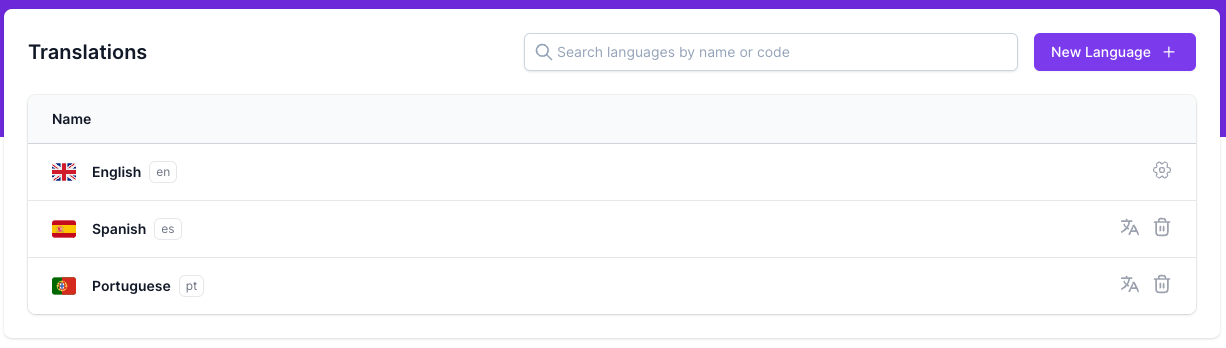
Managing Translations
To manage the translations for a language, click on the language line, and you will be met with a list of all the translations for that language:
You can filter this list using a search box or simply click on the translation string you want to add to the database:
Enter your translation and click on Save. This will save the translation to the database. To publish them – you have two options:
1: Run php artisan translations:export to export all translations to the resources/lang folder. 2: Press the Publish button on the UI.
In both cases, you should see that your translated strings are now available in your application:
That’s it! You can now manage your translations using this package.
Conclusion
This package provides a very nice and intuitive UI experience to manage the translations for your application. It’s very easy to use, and it has a lot of features that make it a great choice for managing translations. One thing to note is that there are steps that you need to take to protect the UI from unauthorized users. You can read more about that here.
Repository: https://github.com/LaravelDaily/laravel-localization-course/tree/lesson/packages/MohmmedAshraf-translations
We just looked at a few ways to manage the static text translations. While each of them is good in its own space, there is no one size fits all solution. It really depends on your project and your team.
My short list of recommendations would be this:
- If you need to translate just the text and want to build your own UI – Spatie package is a good choice.
- If you need to translate the routes – Mcamara package
- If you need to translate just the text but don’t want to build your UI – You can use Nikaia package or MohmmedAshraf package
- If there’s a need for text and routes – look into combining the packages. For example, you can use Mcamara package and any of the remaining ones for the text.
We’ve covered translations for static text and routes, but what about the Models? What if we have a Blog Post that we want to store in a multi-language format?
There are quite a few ways to do this, but first, let’s look at the simplest way without any packages:
Let’s Get Started
For this demo, we will create Posts in multiple languages. The idea here will be:
- Make sure that we have a list of supported locales somewhere (for example in
config/app.phpassupportedLocales) - Create a
Postmodel that will have all the details about the post, except for the title and content - Create a
PostTranslationmodel that will have the title and content of the post in a specific language - Automatically load the current locale translation of the post when we retrieve the post (with
hasOnerelation and attribute mutators in ourPostmodel) - Validate each translated field for each supported locale
- Create a
Postand its translations in one go
Here’s the database schema for our Post and its translations in PostTranslation:
Migration
Schema::create('posts', function (Blueprint $table) { $table->id(); $table->dateTime('publish_date')->nullable(); $table->foreignId('user_id')->constrained(); $table->softDeletes(); $table->timestamps();});Schema::create('post_translations', function (Blueprint $table) { $table->id(); $table->foreignId('post_id')->constrained()->cascadeOnDelete(); $table->string('locale'); $table->string('title'); $table->longText('post'); $table->softDeletes(); $table->timestamps();});Our Post model, which will contain a title and post attributes to always have the current locale translation of the text:
app/Models/Post.php
use Illuminate\Database\Eloquent\Casts\Attribute;use Illuminate\Database\Eloquent\Model;use Illuminate\Database\Eloquent\Relations\BelongsTo;use Illuminate\Database\Eloquent\Relations\HasMany;use Illuminate\Database\Eloquent\Relations\HasOne;use Illuminate\Database\Eloquent\SoftDeletes;class Post extends Model{ use SoftDeletes; protected $fillable = [ 'publish_date', 'user_id', ]; protected $casts = [ 'publish_date' => 'datetime', ]; // Preloading current locale translation at all times protected $with = [ 'defaultTranslation' ]; public function title(): Attribute { return new Attribute( // Always making sure that we have current locale title get: fn() => $this->defaultTranslation->title, ); } public function post(): Attribute { return new Attribute( // Always making sure that we have current locale post model get: fn() => $this->defaultTranslation->post, ); } public function author(): BelongsTo { return $this->belongsTo(User::class, 'user_id'); } public function translations(): HasMany { return $this->hasMany(PostTranslation::class); } public function defaultTranslation(): HasOne { // Making sure that we always retrieve current locale information return $this->translations()->one()->where('locale', app()->getLocale()); }}And our PostTranslation model:
app/Models/PostTranslation.php
use Illuminate\Database\Eloquent\Model;use Illuminate\Database\Eloquent\Relations\BelongsTo;use Illuminate\Database\Eloquent\SoftDeletes;class PostTranslation extends Model{ use SoftDeletes; protected $fillable = [ 'post_id', 'locale', 'title', 'post', ]; public function post(): BelongsTo { return $this->belongsTo(Post::class); }}Once we have our Models, we can look into our PostController and see how we can create a new post with translations:
app/Http/Controllers/PostController.php
use App\Models\Post;use App\Models\User;use Illuminate\Http\RedirectResponse;use Illuminate\Http\Request;class PostController extends Controller{ public function index() { $posts = Post::all(); return view('posts.index', compact('posts')); } public function create() { $authors = User::pluck('name', 'id'); return view('posts.create', compact('authors')); } public function store(Request $request): RedirectResponse { $rules = [ 'publish_date' => ['nullable', 'date'], 'author_id' => ['required', 'numeric'], ]; // Adding validation for each available locale foreach (config('app.supportedLocales') as $locale) { $rules += [ 'title.' . $locale => ['required', 'string'], 'post.' . $locale => ['required', 'string'], ]; } $this->validate($request, $rules); $post = Post::create([ 'user_id' => $request->input('author_id'), 'publish_date' => $request->input('publish_date'), ]); // Saving translations for each available locale foreach (config('app.supportedLocales') as $locale) { $post->translations()->create([ 'locale' => $locale, 'title' => $request->input('title.' . $locale), 'post' => $request->input('post.' . $locale), ]); } return redirect()->route('posts.index'); } public function edit(Post $post) { $authors = User::pluck('name', 'id'); $post->load(['translations']); return view('posts.edit', compact('post', 'authors')); } public function update(Request $request, Post $post): RedirectResponse { $rules = [ 'publish_date' => ['nullable', 'date'], 'author_id' => ['required', 'numeric'], ]; // Adding validation for each available locale foreach (config('app.supportedLocales') as $locale) { $rules += [ 'title.' . $locale => ['required', 'string'], 'post.' . $locale => ['required', 'string'], ]; } $this->validate($request, $rules); $post->update([ 'user_id' => $request->input('author_id'), 'publish_date' => $request->input('publish_date'), ]); // Updating translations for each available locale foreach (config('app.supportedLocales') as $locale) { $post->translations()->updateOrCreate([ 'locale' => $locale ], [ 'title' => $request->input('title.' . $locale), 'post' => $request->input('post.' . $locale), ]); } return redirect()->route('posts.index'); } public function destroy(Post $post): RedirectResponse { $post->delete(); return redirect()->route('posts.index'); }}Lastly, we can look into our Post views and see how we can display the translated model to the user:
resources/views/posts/index.blade.php
<table class="w-full"> <thead> <tr> <th>ID</th> <th>Title</th> <th>Excerpt</th> <th>Published at</th> <th>Actions</th> </tr> </thead> <tbody> @foreach($posts as $post) <tr> <td>{{ $post->id }}</td> {{-- We don't need to load anything as we already have pre-loaded the default translation --}} <td>{{ $post->title }}</td> {{-- We don't need to load anything as we already have pre-loaded the default translation --}} <td>{{ Str::of($post->post)->limit() }}</td> <td>{{ $post->publish_date ?? 'Unpublished' }}</td> <td> {{-- ... --}} </td> </tr> @endforeach </tbody></table>As you can see, in our index we don’t have to work with translation-specific things. We are already doing that in our Post Model with the defaultTranslation relationship and the title and post attributes.
Typically you would load the translations in the Controller and pass them to the view, but in this case, we are doing it in the Model. And we made sure that we are only loading the translations when we need them.
Next up is our create view, which is a bit more complicated:
resources/views/posts/create.blade.php
<form action="{{ route('posts.store') }}" method="POST"> @csrf <div class="mb-4"> <label for="author_id" class="sr-only">Author</label> <select name="author_id" id="author_id" class="bg-gray-100 border-2 w-full p-4 rounded-lg @error('author_id') border-red-500 @enderror"> <option value="">Select author</option> @foreach($authors as $id => $name) <option value="{{ $id }}">{{ $name }}</option> @endforeach </select> @error('author_id') <div class="text-red-500 mt-2 text-sm"> {{ $message }} </div> @enderror </div> @foreach(config('app.supportedLocales') as $locale) <fieldset class="border-2 w-full p-4 rounded-lg mb-4"> <label>Text for {{ $locale }}</label> <div class="mb-4"> <label for="title[{{$locale}}]" class="sr-only">Title</label> <input type="text" name="title[{{$locale}}]" id="title[{{$locale}}]" placeholder="Title" class="bg-gray-100 border-2 w-full p-4 rounded-lg @error('title') border-red-500 @enderror" value="{{ old('title.'. $locale) }}"> @error('title.'.$locale) <div class="text-red-500 mt-2 text-sm"> {{ $message }} </div> @enderror </div> <div class=""> <label for="post[{{$locale}}]" class="sr-only">Body</label> <textarea name="post[{{$locale}}]" id="post[{{$locale}}]" cols="30" rows="4" placeholder="Post" class="bg-gray-100 border-2 w-full p-4 rounded-lg @error('post'.$locale) border-red-500 @enderror">{{ old('post'.$locale) }}</textarea> @error('post.'.$locale) <div class="text-red-500 mt-2 text-sm"> {{ $message }} </div> @enderror </div> </fieldset> @endforeach <div class="mb-4"> <label for="publish_date" class="sr-only">Published at</label> <input type="datetime-local" name="publish_date" id="publish_date" placeholder="Published at" class="bg-gray-100 border-2 w-full p-4 rounded-lg @error('publish_date') border-red-500 @enderror" value="{{ old('publish_date') }}"> @error('publish_date') <div class="text-red-500 mt-2 text-sm"> {{ $message }} </div> @enderror </div> <div> <button type="submit" class="bg-blue-500 text-white px-4 py-3 rounded font-medium w-full"> Create </button> </div></form>Take a close look at the @foreach(config('app.supportedLocales') as $locale) loop. We are looping through all the available locales and creating a field set for each one of them. That way we can display fields for each locale.
Another thing to look at is our name attributes. We are using the arrays for title and post to make sure that we can send all the translations in one request.
Next up is our edit view, which is very similar to our create view:
resources/views/posts/edit.blade.php
<form action="{{ route('posts.update', $post->id) }}" method="POST"> @csrf @method('PUT') <div class="mb-4"> <label for="author_id" class="sr-only">Author</label> <select name="author_id" id="author_id" class="bg-gray-100 border-2 w-full p-4 rounded-lg @error('author_id') border-red-500 @enderror"> <option value="">Select author</option> @foreach($authors as $id => $name) <option value="{{ $id }}" @selected(old('author_id', $post->user_id) === $id)>{{ $name }}</option> @endforeach </select> @error('author_id') <div class="text-red-500 mt-2 text-sm"> {{ $message }} </div> @enderror </div> @foreach(config('app.supportedLocales') as $locale) <fieldset class="border-2 w-full p-4 rounded-lg mb-4"> <label>Text for {{ $locale }}</label> <div class="mb-4"> <label for="title[{{$locale}}]" class="sr-only">Title</label> <input type="text" name="title[{{$locale}}]" id="title[{{$locale}}]" placeholder="Title" class="bg-gray-100 border-2 w-full p-4 rounded-lg @error('title') border-red-500 @enderror" value="{{ old('title.'. $locale, $post->translations->where('locale', $locale)->first()?->title) }}"> @error('title.'.$locale) <div class="text-red-500 mt-2 text-sm"> {{ $message }} </div> @enderror </div> <div class=""> <label for="post[{{$locale}}]" class="sr-only">Body</label> <textarea name="post[{{$locale}}]" id="post[{{$locale}}]" cols="30" rows="4" placeholder="Post" class="bg-gray-100 border-2 w-full p-4 rounded-lg @error('post'.$locale) border-red-500 @enderror">{{ old('post'.$locale, $post->translations->where('locale', $locale)->first()?->post) }}</textarea> @error('post.'.$locale) <div class="text-red-500 mt-2 text-sm"> {{ $message }} </div> @enderror </div> </fieldset> @endforeach <div class="mb-4"> <label for="publish_date" class="sr-only">Published at</label> <input type="datetime-local" name="publish_date" id="publish_date" placeholder="Published at" class="bg-gray-100 border-2 w-full p-4 rounded-lg @error('publish_date') border-red-500 @enderror" value="{{ old('publish_date', $post->publish_date) }}"> @error('publish_date') <div class="text-red-500 mt-2 text-sm"> {{ $message }} </div> @enderror </div> <div> <button type="submit" class="bg-blue-500 text-white px-4 py-3 rounded font-medium w-full"> Update </button> </div></form>Here you will see the same @foreach loop as in our create view. We are also using the old helper to prefill the form with the values that were submitted. If there are no values submitted, we are using the values from the database based on the translations relationship that we loaded in our PostController edit method.
Repository: https://github.com/LaravelDaily/laravel-localization-course/tree/lesson/translating-content
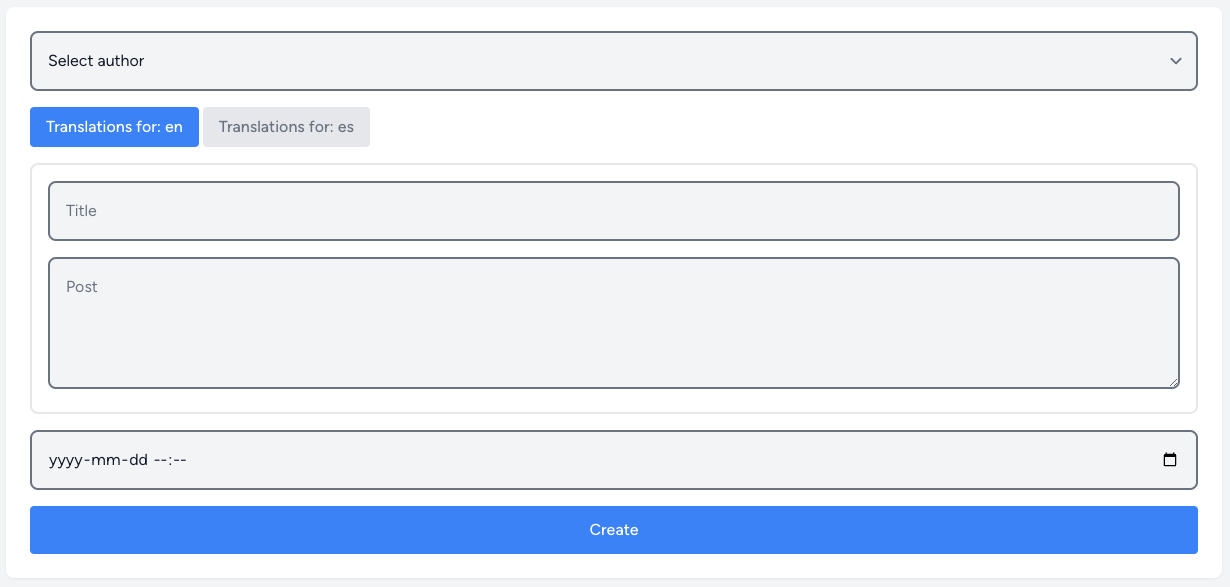
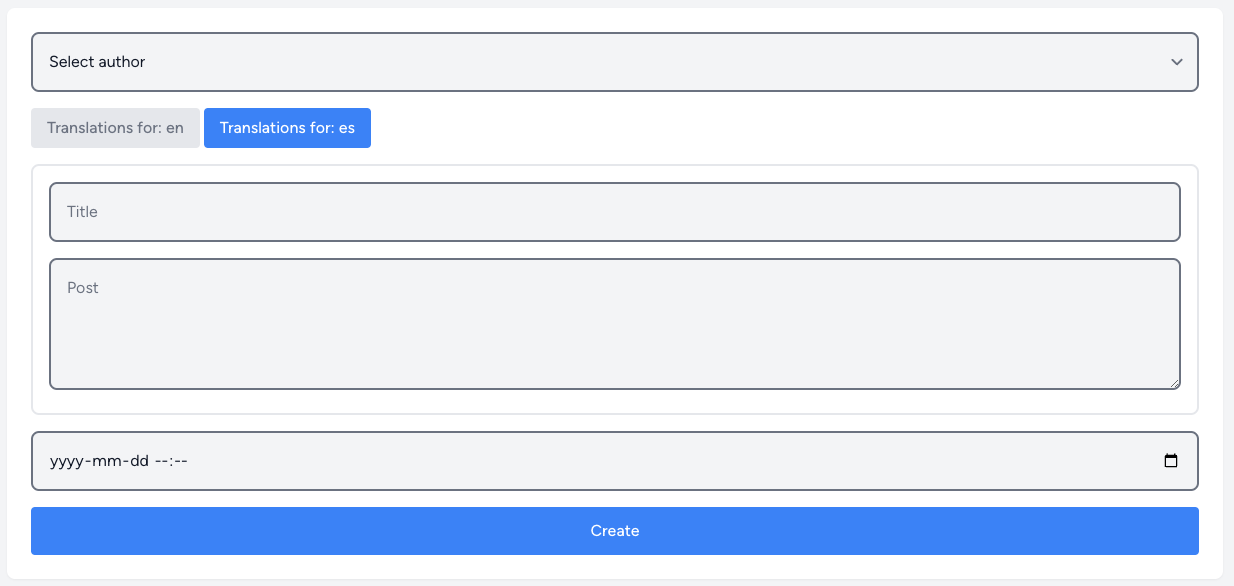
In this lesson, we are going to re-create the same scenario as in the previous lesson, but using Livewire to create the form with more dynamic elements.
Our base logic and setup are the same as in the previous lesson, so we will skip that part and start modifying the forms to support a nice user experience.
Installing Livewire
To install Livewire, we need to run the following command:
composer require livewire/livewireThen we need to include Javascript and CSS files in our app.blade.php layout:
resources/views/layouts/app.blade.php
<!DOCTYPE html><html lang="{{ str_replace('_', '-', app()->getLocale()) }}"> <head> {{-- ... --}} @livewireStyles {{-- Including styles --}} </head> <body class="font-sans antialiased"> {{-- ... --}} @livewireScripts {{-- Including scripts --}} </body></html>Now we are ready to use Livewire.
Creating Livewire Components
For this example, we’ll create a single component that will handle switching languages and form inputs:
php artisan make:livewire PostContentPerLanguageWith the following code on the PHP side:
app/Http/Livewire/PostContentPerLanguage.php
use App\Models\Post;use Livewire\Component;class PostContentPerLanguage extends Component{ public ?Post $post; public string $currentLanguage; public array $languagesList; public function mount(): void { $this->currentLanguage = app()->getLocale(); $this->languagesList = config('app.supportedLocales', []); } public function render() { return view('livewire.post-content-per-language'); } public function changeLocale($locale): void { if (in_array($locale, $this->languagesList)) { $this->currentLanguage = $locale; } }}And the following code on View:
resources/views/livewire/post-content-per-language.blade.php
<div> <div class="w-full mb-4"> @foreach($languagesList as $locale) <button type="button" wire:click="changeLocale('{{ $locale }}')" @class([ 'bg-blue-500 text-white px-4 py-2 rounded font-medium inline' => $locale == $currentLanguage, 'bg-gray-200 text-gray-500 px-4 py-2 rounded font-medium inline' => $locale != $currentLanguage, ]) > Translations for: {{ $locale }} </button> @endforeach </div> @foreach($languagesList as $locale) <fieldset @class(['hidden' => $locale != $currentLanguage, 'border-2 w-full p-4 rounded-lg mb-4'])> <div class="mb-4"> <label for="title[{{$locale}}]" class="sr-only">Title</label> <input type="text" name="title[{{$locale}}]" id="title[{{$locale}}]" placeholder="Title" class="bg-gray-100 border-2 w-full p-4 rounded-lg @error('title') border-red-500 @enderror" value="{{ old('title.'. $locale, $post?->translations->where('locale', $locale)->first()?->title) }}"> @error('title.'.$locale) <div class="text-red-500 mt-2 text-sm"> {{ $message }} </div> @enderror </div> <div class=""> <label for="post[{{$locale}}]" class="sr-only">Body</label> <textarea name="post[{{$locale}}]" id="post[{{$locale}}]" cols="30" rows="4" placeholder="Post" class="bg-gray-100 border-2 w-full p-4 rounded-lg @error('post'.$locale) border-red-500 @enderror">{{ old('post'.$locale, $post?->translations->where('locale', $locale)->first()?->post) }}</textarea> @error('post.'.$locale) <div class="text-red-500 mt-2 text-sm"> {{ $message }} </div> @enderror </div> </fieldset> @endforeach</div>The next step is to modify our form to use this component:
resources/views/posts/create.blade.php
<form action="{{ route('posts.store') }}" method="POST"> @csrf <div class="mb-4"> <label for="author_id" class="sr-only">Author</label> <select name="author_id" id="author_id" class="bg-gray-100 border-2 w-full p-4 rounded-lg @error('author_id') border-red-500 @enderror"> <option value="">Select author</option> @foreach($authors as $id => $name) <option value="{{ $id }}">{{ $name }}</option> @endforeach </select> @error('author_id') <div class="text-red-500 mt-2 text-sm"> {{ $message }} </div> @enderror </div> <livewire:post-content-per-language/> <div class="mb-4"> <label for="publish_date" class="sr-only">Published at</label> <input type="datetime-local" name="publish_date" id="publish_date" placeholder="Published at" class="bg-gray-100 border-2 w-full p-4 rounded-lg @error('publish_date') border-red-500 @enderror" value="{{ old('publish_date') }}"> @error('publish_date') <div class="text-red-500 mt-2 text-sm"> {{ $message }} </div> @enderror </div> <div> <button type="submit" class="bg-blue-500 text-white px-4 py-3 rounded font-medium w-full"> Create </button> </div></form>And edit view:
resources/views/posts/edit.blade.php
<form action="{{ route('posts.update', $post->id) }}" method="POST"> @csrf @method('PUT') <div class="mb-4"> <label for="author_id" class="sr-only">Author</label> <select name="author_id" id="author_id" class="bg-gray-100 border-2 w-full p-4 rounded-lg @error('author_id') border-red-500 @enderror"> <option value="">Select author</option> @foreach($authors as $id => $name) <option value="{{ $id }}" @selected(old('author_id', $post->user_id) === $id)>{{ $name }}</option> @endforeach </select> @error('author_id') <div class="text-red-500 mt-2 text-sm"> {{ $message }} </div> @enderror </div> <livewire:post-content-per-language :post="$post"/> <div class="mb-4"> <label for="publish_date" class="sr-only">Published at</label> <input type="datetime-local" name="publish_date" id="publish_date" placeholder="Published at" class="bg-gray-100 border-2 w-full p-4 rounded-lg @error('publish_date') border-red-500 @enderror" value="{{ old('publish_date', $post->publish_date) }}"> @error('publish_date') <div class="text-red-500 mt-2 text-sm"> {{ $message }} </div> @enderror </div> <div> <button type="submit" class="bg-blue-500 text-white px-4 py-3 rounded font-medium w-full"> Update </button> </div></form>As you can see, we removed the big and ugly foreach loop and replaced it with a single component:
<livewire:post-content-per-language/> {{-- For create form --}}{{-- And --}}<livewire:post-content-per-language :post="$post"/> {{-- For edit form --}}Due to the basic implementation of just the switcher with hidden classes – we don’t have to modify our controller at all. We can just use the same code as before!
Opening our create form, we can see that it works as expected:
And the same for the edit form:
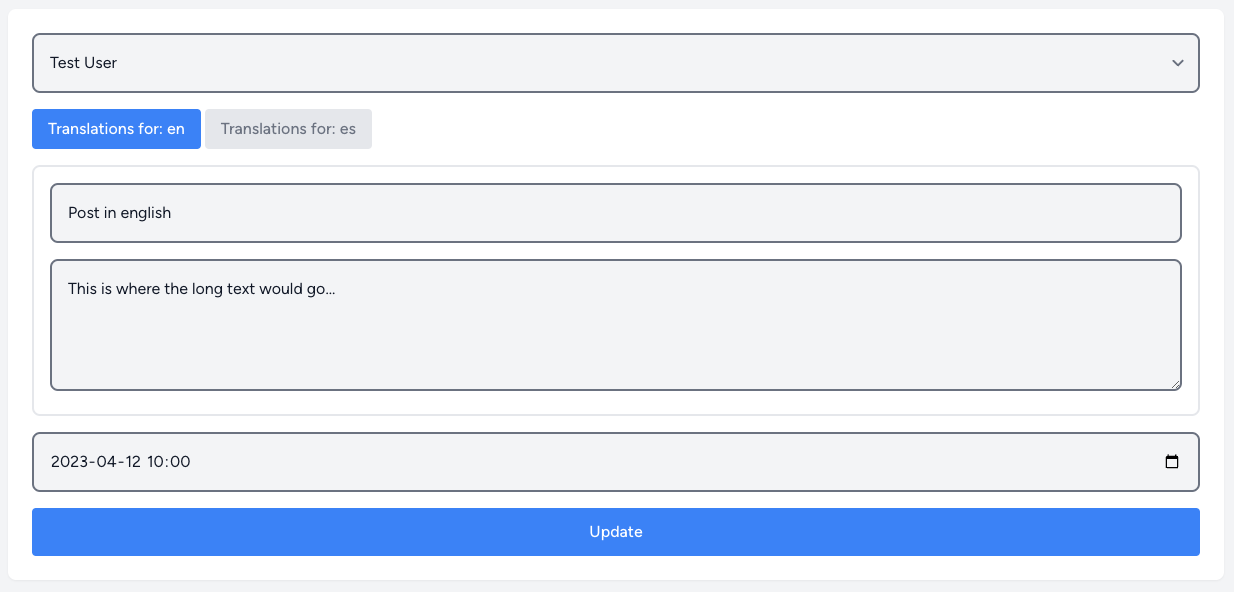
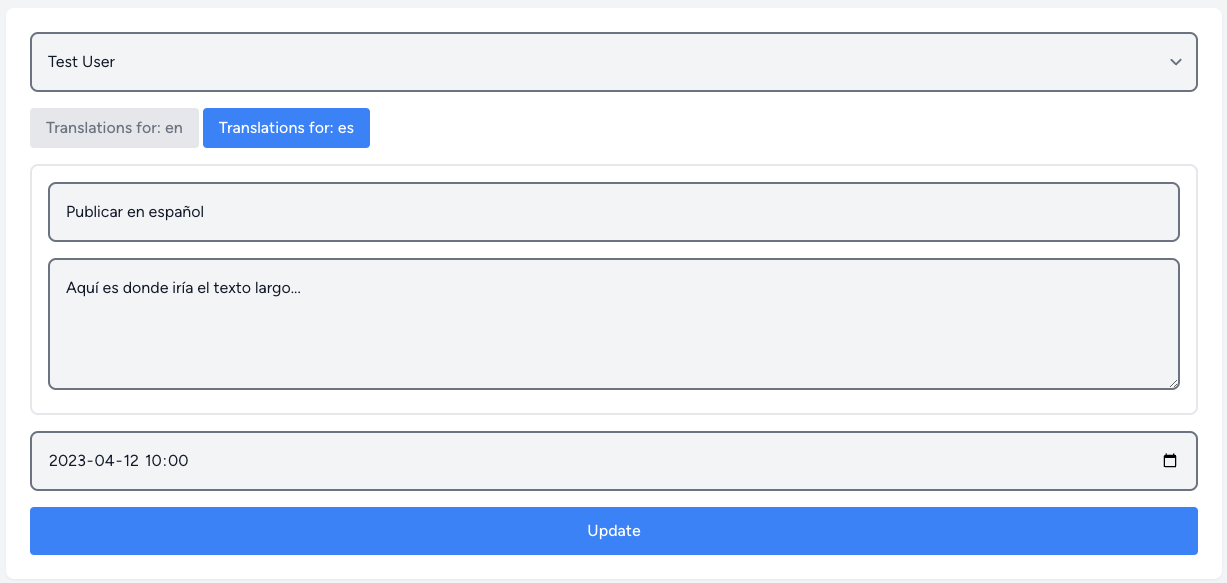
While it might not be perfect, it’s a great example of how you can use Livewire to create reactive components and handle situations like this.
So, we have looked at how we can add localized models in a simple way, without any packages. However, this might become a bit tedious if we have a lot of Models to translate. In the upcoming lessons, I will show example demos with two packages that may help:
- spatie/laravel-translatable
- astrotomic/laravel-translatable
Spatie Laravel Translatable
This package allows you to store your translations in a single database table with a JSON-type column. It will store all languages in a single database column. This is a great way to keep your database clean and simple.
Astrotomic Laravel Translatable
This package is different due to its requirement to store translations on a separate database table. It requires more setup initially but provides a lot of flexibility.
Repository: https://github.com/LaravelDaily/laravel-localization-course/tree/lesson/translating-content-livewire
Instead of creating multiple tables and handling translations via a different table, this package uses a single table and a JSON column to store the translations.

Installation
Installation guide for this package is really simple and consists only of two steps:
Require the package via composer:
composer require spatie/laravel-translatableAnd for the models you want to translate add the Spatie\Translatable\HasTranslations trait with $translatable property:
Model
use Spatie\Translatable\HasTranslations;class Post extends Model{ use HasTranslations; public $translatable = ['title'];}That is it! Now if you set up the database column title to be a JSON column (or TEXT in unsupported databases), you can start using the package.
Usage
Here’s a quick example of how we used this package:
Migration
Schema::create('posts', function (Blueprint $table) { $table->id(); $table->foreignId('user_id')->constrained(); $table->dateTime('publish_date')->nullable(); $table->json('title'); // <--- JSON column for title $table->json('post'); // <--- JSON column for post $table->softDeletes(); $table->timestamps();});app/Models/Post.php
use Spatie\Translatable\HasTranslations;// ...class Post extends Model{ use SoftDeletes; use HasTranslations; public $translatable = ['title', 'post']; protected $fillable = [ 'user_id', 'publish_date', 'title', 'post' ];}app/Http/Controllers/PostController.php
use App\Models\Post;use App\Models\User;use Illuminate\Http\RedirectResponse;use Illuminate\Http\Request;class PostController extends Controller{ public function index() { $posts = Post::all(); return view('posts.index', compact('posts')); } public function create() { $authors = User::pluck('name', 'id'); return view('posts.create', compact('authors')); } public function store(Request $request): RedirectResponse { $rules = [ 'publish_date' => ['nullable', 'date'], 'author_id' => ['required', 'numeric'], ]; // Adding validation for each available locale foreach (config('app.supportedLocales') as $locale) { $rules += [ 'title.' . $locale => ['required', 'string'], 'post.' . $locale => ['required', 'string'], ]; } $this->validate($request, $rules); $post = Post::create([ 'user_id' => $request->input('author_id'), 'publish_date' => $request->input('publish_date'), 'title' => $request->input('title'), // <-- This will be an array of translations 'post' => $request->input('post'), // <-- This will be an array of translations ]); return redirect()->route('posts.index'); } public function edit(Post $post) { $authors = User::pluck('name', 'id'); return view('posts.edit', compact('post', 'authors')); } public function update(Request $request, Post $post): RedirectResponse { $rules = [ 'publish_date' => ['nullable', 'date'], 'author_id' => ['required', 'numeric'], ]; // Adding validation for each available locale foreach (config('app.supportedLocales') as $locale) { $rules += [ 'title.' . $locale => ['required', 'string'], 'post.' . $locale => ['required', 'string'], ]; } $this->validate($request, $rules); $post->update([ 'user_id' => $request->input('author_id'), 'publish_date' => $request->input('publish_date'), 'title' => $request->input('title'), // <-- This will be an array of translations 'post' => $request->input('post'), // <-- This will be an array of translations ]); return redirect()->route('posts.index'); } public function destroy(Post $post): RedirectResponse { $post->delete(); return redirect()->route('posts.index'); }}And finally the views:
resources/views/posts/index.blade.php
<table class="w-full"> <thead> <tr> <th>ID</th> <th>Title</th> <th>Excerpt</th> <th>Published at</th> <th>Actions</th> </tr> </thead> <tbody> @foreach($posts as $post) <tr> <td>{{ $post->id }}</td> <td>{{ $post->title }}</td> {{-- As you can see, we get just the title. The package handles the rest. --}} <td>{{ Str::of($post->post)->limit() }}</td> {{-- As you can see, we get just the post. The package handles the rest. --}} <td>{{ $post->publish_date ?? 'Unpublished' }}</td> <td> {{-- ... --}} </td> </tr> @endforeach </tbody></table>As you see – we didn’t have to specify which language we want to display as default. It is done by the package itself!
On create we will make an array of translations for each field:
resources/views/posts/create.blade.php
<form action="{{ route('posts.store') }}" method="POST"> @csrf <div class="mb-4"> <label for="author_id" class="sr-only">Author</label> <select name="author_id" id="author_id" class="bg-gray-100 border-2 w-full p-4 rounded-lg @error('author_id') border-red-500 @enderror"> <option value="">Select author</option> @foreach($authors as $id => $name) <option value="{{ $id }}">{{ $name }}</option> @endforeach </select> @error('author_id') <div class="text-red-500 mt-2 text-sm"> {{ $message }} </div> @enderror </div> @foreach(config('app.supportedLocales') as $locale) {{-- Looping through all available locales to create an array for `title` and `post` fields with locales --}} <fieldset class="border-2 w-full p-4 rounded-lg mb-4"> <label>Text for {{ $locale }}</label> <div class="mb-4"> <label for="title[{{$locale}}]" class="sr-only">Title</label> <input type="text" name="title[{{$locale}}]" id="title[{{$locale}}]" placeholder="Title" class="bg-gray-100 border-2 w-full p-4 rounded-lg @error('title') border-red-500 @enderror" value="{{ old('title.'. $locale) }}"> @error('title.'.$locale) <div class="text-red-500 mt-2 text-sm"> {{ $message }} </div> @enderror </div> <div class=""> <label for="post[{{$locale}}]" class="sr-only">Body</label> <textarea name="post[{{$locale}}]" id="post[{{$locale}}]" cols="30" rows="4" placeholder="Post" class="bg-gray-100 border-2 w-full p-4 rounded-lg @error('post'.$locale) border-red-500 @enderror">{{ old('post'.$locale) }}</textarea> @error('post.'.$locale) <div class="text-red-500 mt-2 text-sm"> {{ $message }} </div> @enderror </div> </fieldset> @endforeach <div class="mb-4"> <label for="publish_date" class="sr-only">Published at</label> <input type="datetime-local" name="publish_date" id="publish_date" placeholder="Published at" class="bg-gray-100 border-2 w-full p-4 rounded-lg @error('publish_date') border-red-500 @enderror" value="{{ old('publish_date') }}"> @error('publish_date') <div class="text-red-500 mt-2 text-sm"> {{ $message }} </div> @enderror </div> <div> <button type="submit" class="bg-blue-500 text-white px-4 py-3 rounded font-medium w-full"> Create </button> </div></form>The same for editing, but we will have to load specific translations for each field:
resources/views/posts/edit.blade.php
<form action="{{ route('posts.update', $post->id) }}" method="POST"> @csrf @method('PUT') <div class="mb-4"> <label for="author_id" class="sr-only">Author</label> <select name="author_id" id="author_id" class="bg-gray-100 border-2 w-full p-4 rounded-lg @error('author_id') border-red-500 @enderror"> <option value="">Select author</option> @foreach($authors as $id => $name) <option value="{{ $id }}" @selected(old('author_id', $post->user_id) === $id)>{{ $name }}</option> @endforeach </select> @error('author_id') <div class="text-red-500 mt-2 text-sm"> {{ $message }} </div> @enderror </div> @foreach(config('app.supportedLocales') as $locale) {{-- Looping through all available locales to create an array for `title` and `post` fields with locales --}} <fieldset class="border-2 w-full p-4 rounded-lg mb-4"> <label>Text for {{ $locale }}</label> <div class="mb-4"> <label for="title[{{$locale}}]" class="sr-only">Title</label> <input type="text" name="title[{{$locale}}]" id="title[{{$locale}}]" placeholder="Title" class="bg-gray-100 border-2 w-full p-4 rounded-lg @error('title') border-red-500 @enderror" value="{{ old('title.'. $locale, $post->getTranslation('title', $locale)) }}"> @error('title.'.$locale) <div class="text-red-500 mt-2 text-sm"> {{ $message }} </div> @enderror </div> <div class=""> <label for="post[{{$locale}}]" class="sr-only">Body</label> <textarea name="post[{{$locale}}]" id="post[{{$locale}}]" cols="30" rows="4" placeholder="Post" class="bg-gray-100 border-2 w-full p-4 rounded-lg @error('post'.$locale) border-red-500 @enderror">{{ old('post'.$locale, $post->getTranslation('post', $locale)) }}</textarea> @error('post.'.$locale) <div class="text-red-500 mt-2 text-sm"> {{ $message }} </div> @enderror </div> </fieldset> @endforeach <div class="mb-4"> <label for="publish_date" class="sr-only">Published at</label> <input type="datetime-local" name="publish_date" id="publish_date" placeholder="Published at" class="bg-gray-100 border-2 w-full p-4 rounded-lg @error('publish_date') border-red-500 @enderror" value="{{ old('publish_date', $post->publish_date) }}"> @error('publish_date') <div class="text-red-500 mt-2 text-sm"> {{ $message }} </div> @enderror </div> <div> <button type="submit" class="bg-blue-500 text-white px-4 py-3 rounded font-medium w-full"> Update </button> </div></form>In edit, you will see $post->getTranslation('title', $locale) and $post->getTranslation('post', $locale). This is how we get the translation for a specific locale. We can also use $post->title and $post->post but this will return the translation for the current locale which is not good if we want to edit all the locales.
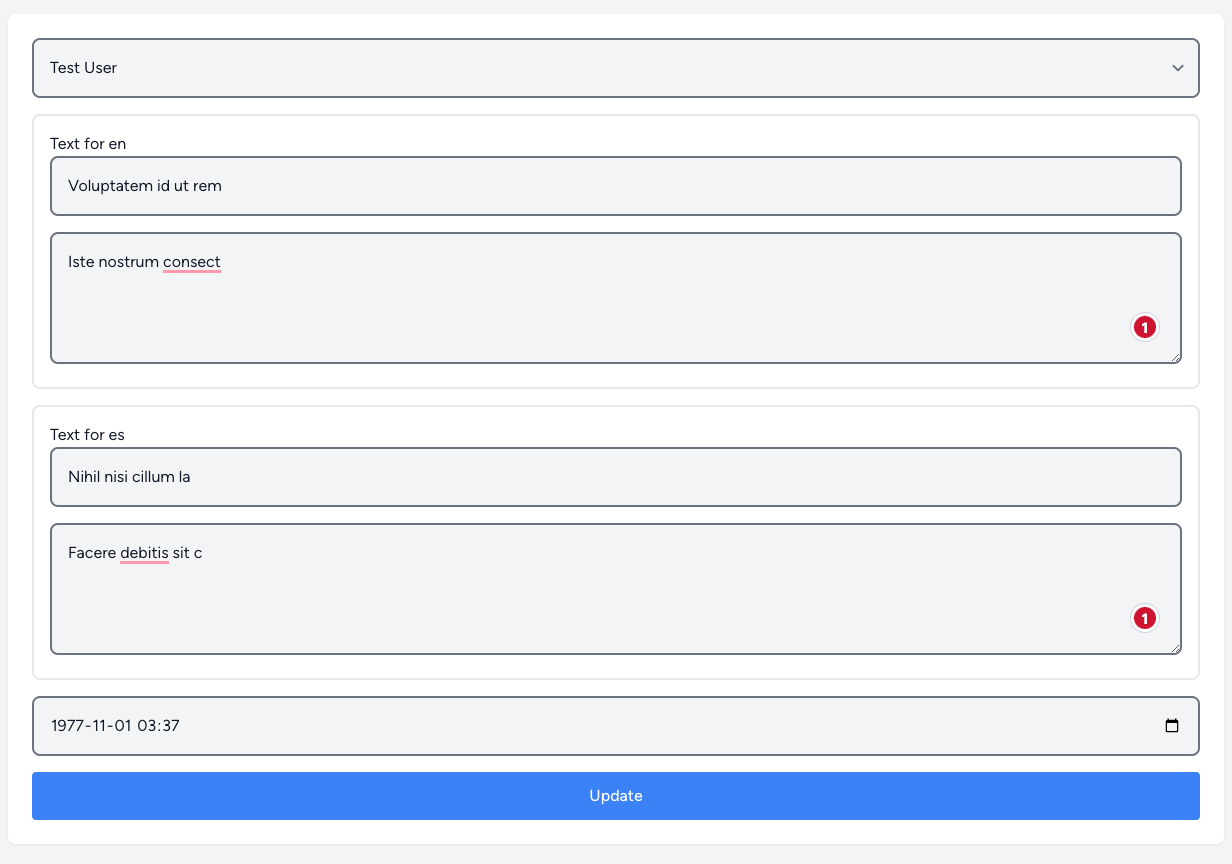
Repository: https://github.com/LaravelDaily/laravel-localization-course/tree/lesson/modelPackages/spatie
This package relies on a separate DB table to contain all of your localized model information. You will have to manually create this table and add the necessary columns. The package will then automatically handle the rest.
In other words, it requires more setup initially but provides a lot of flexibility.
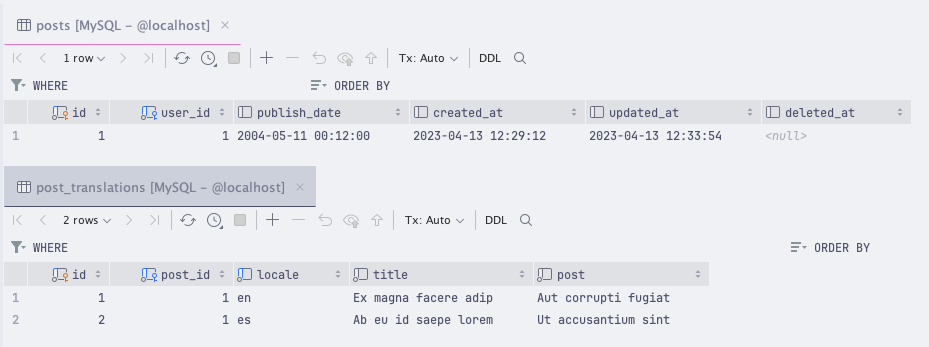
Installation
In the full installation guide we can quickly spot that it’s not too complicated to install this package:
Installing package via composer:
composer require astrotomic/laravel-translatablePublishing the config file:
php artisan vendor:publish --tag=translatableAdapting the configuration file to our case:
'locales' => [ 'en', 'es',],This will set the base up for us to use.
Usage
After the initial setup, we have to adapt our Models to use the translation, which will require quite a bit of coding (but it’s not too complicated).
Use this package, the biggest difference is in Migrations and Models:
Migration
Schema::create('posts', function (Blueprint $table) { // <-- Our parent table $table->id(); $table->foreignId('user_id')->constrained(); $table->dateTime('publish_date')->nullable(); $table->timestamps(); $table->softDeletes();});// Our translations table defined for EACH model that's translatableSchema::create('post_translations', function (Blueprint $table) { $table->increments('id'); $table->foreignId('post_id')->constrained(); $table->string('locale')->index(); $table->string('title'); $table->text('post'); $table->unique(['post_id', 'locale']);});Since we created two new tables, this means that we have to have 2 models:
app/Models/Post.php
use Astrotomic\Translatable\Contracts\Translatable as TranslatableContract;use Astrotomic\Translatable\Translatable;use Illuminate\Database\Eloquent\Model;use Illuminate\Database\Eloquent\Relations\BelongsTo;use Illuminate\Database\Eloquent\SoftDeletes;class Post extends Model implements TranslatableContract{ use Translatable; use SoftDeletes; // Here we define which attributes are translatable public $translatedAttributes = ['title', 'post']; protected $fillable = ['user_id', 'publish_date']; public function author(): BelongsTo { return $this->belongsTo(User::class, 'user_id'); }}And translations model:
app/Models/PostTranslation.php
use Illuminate\Database\Eloquent\Model;class PostTranslation extends Model{ public $timestamps = false; // <-- We don't need timestamps for translations protected $fillable = ['title', 'post'];}That’s it, we have set up our models to use translations. Now it’s time to implement it:
app/Http/Controllers/PostController.php
use App\Models\Post;use App\Models\User;use Illuminate\Http\RedirectResponse;use Illuminate\Http\Request;class PostController extends Controller{ public function index() { $posts = Post::all(); return view('posts.index', compact('posts')); } public function create() { $authors = User::pluck('name', 'id'); return view('posts.create', compact('authors')); } public function store(Request $request): RedirectResponse { $rules = [ 'publish_date' => ['nullable', 'date'], 'user_id' => ['required', 'numeric'], ]; // Adding validation for each available locale foreach (config('translatable.locales') as $locale) { $rules += [ $locale . '.title' => ['required', 'string'], $locale . '.post' => ['required', 'string'], ]; } $this->validate($request, $rules); // We should use `$request->validated()` if we are using `FormRequest` $post = Post::create($request->all()); return redirect()->route('posts.index'); } public function edit(Post $post) { $authors = User::pluck('name', 'id'); return view('posts.edit', compact('post', 'authors')); } public function update(Request $request, Post $post): RedirectResponse { $rules = [ 'publish_date' => ['nullable', 'date'], 'user_id' => ['required', 'numeric'], ]; // Adding validation for each available locale foreach (config('translatable.locales') as $locale) { $rules += [ $locale . '.title' => ['required', 'string'], $locale . '.post' => ['required', 'string'], ]; } $this->validate($request, $rules); // We should use `$request->validated()` if we are using `FormRequest` $post->update($request->all()); return redirect()->route('posts.index'); } public function destroy(Post $post): RedirectResponse { $post->delete(); return redirect()->route('posts.index'); }}And the views:
resources/views/posts/index.blade.php
<table class="w-full"> <thead> <tr> <th>ID</th> <th>Title</th> <th>Excerpt</th> <th>Published at</th> <th>Actions</th> </tr> </thead> <tbody> @foreach($posts as $post) <tr> <td>{{ $post->id }}</td> <td>{{ $post->title }}</td> <td>{{ Str::of($post->post)->limit() }}</td> <td>{{ $post->publish_date ?? 'Unpublished' }}</td> <td> {{-- ... --}} </td> </tr> @endforeach </tbody></table>The create form:
resources/views/posts/create.blade.php
<form action="{{ route('posts.store') }}" method="POST"> @csrf <div class="mb-4"> <label for="user_id" class="sr-only">Author</label> <select name="user_id" id="user_id" class="bg-gray-100 border-2 w-full p-4 rounded-lg @error('user_id') border-red-500 @enderror"> <option value="">Select author</option> @foreach($authors as $id => $name) <option value="{{ $id }}">{{ $name }}</option> @endforeach </select> @error('user_id') <div class="text-red-500 mt-2 text-sm"> {{ $message }} </div> @enderror </div> @foreach(config('translatable.locales') as $locale) <fieldset class="border-2 w-full p-4 rounded-lg mb-4"> <label>Text for {{ $locale }}</label> <div class="mb-4"> <label for="{{$locale}}[title]" class="sr-only">Title</label> <input type="text" name="{{$locale}}[title]" id="{{$locale}}[title]" placeholder="Title" class="bg-gray-100 border-2 w-full p-4 rounded-lg @error($locale.'.title') border-red-500 @enderror" value="{{ old($locale.'.title') }}"> @error($locale.'.title') <div class="text-red-500 mt-2 text-sm"> {{ $message }} </div> @enderror </div> <div class=""> <label for="{{$locale}}[post]" class="sr-only">Body</label> <textarea name="{{$locale}}[post]" id="{{$locale}}[post]" cols="30" rows="4" placeholder="Post" class="bg-gray-100 border-2 w-full p-4 rounded-lg @error($locale.'.post') border-red-500 @enderror">{{ old($locale.'.post') }}</textarea> @error($locale.'.post') <div class="text-red-500 mt-2 text-sm"> {{ $message }} </div> @enderror </div> </fieldset> @endforeach <div class="mb-4"> <label for="publish_date" class="sr-only">Published at</label> <input type="datetime-local" name="publish_date" id="publish_date" placeholder="Published at" class="bg-gray-100 border-2 w-full p-4 rounded-lg @error('publish_date') border-red-500 @enderror" value="{{ old('publish_date') }}"> @error('publish_date') <div class="text-red-500 mt-2 text-sm"> {{ $message }} </div> @enderror </div> <div> <button type="submit" class="bg-blue-500 text-white px-4 py-3 rounded font-medium w-full"> Create </button> </div></form>One thing to look at – we have different field names. As per documentation we are using locale[field] format. So we have to use old('locale.field') to get the old value too!
Next is our edit form:
resources/views/posts/edit.blade.php
<form action="{{ route('posts.update', $post->id) }}" method="POST"> @csrf @method('PUT') {{ $errors }} <div class="mb-4"> <label for="user_id" class="sr-only">Author</label> <select name="user_id" id="user_id" class="bg-gray-100 border-2 w-full p-4 rounded-lg @error('user_id') border-red-500 @enderror"> <option value="">Select author</option> @foreach($authors as $id => $name) <option value="{{ $id }}" @selected(old('user_id', $post->user_id) === $id)>{{ $name }}</option> @endforeach </select> @error('user_id') <div class="text-red-500 mt-2 text-sm"> {{ $message }} </div> @enderror </div> @foreach(config('translatable.locales') as $locale) <fieldset class="border-2 w-full p-4 rounded-lg mb-4"> <label>Text for {{ $locale }}</label> <div class="mb-4"> <label for="{{$locale}}[title]" class="sr-only">Title</label> <input type="text" name="{{$locale}}[title]" id="{{$locale}}[title]" placeholder="Title" class="bg-gray-100 border-2 w-full p-4 rounded-lg @error($locale.'.title') border-red-500 @enderror" value="{{ old($locale.'.title', $post->{'title:'.$locale}) }}"> @error($locale.'.title') <div class="text-red-500 mt-2 text-sm"> {{ $message }} </div> @enderror </div> <div class=""> <label for="{{$locale}}[post]" class="sr-only">Body</label> <textarea name="{{$locale}}[post]" id="{{$locale}}[post]" cols="30" rows="4" placeholder="Post" class="bg-gray-100 border-2 w-full p-4 rounded-lg @error($locale.'.post') border-red-500 @enderror">{{ old($locale.'.post', $post->{'post:'.$locale}) }}</textarea> @error($locale.'.post') <div class="text-red-500 mt-2 text-sm"> {{ $message }} </div> @enderror </div> </fieldset> @endforeach <div class="mb-4"> <label for="publish_date" class="sr-only">Published at</label> <input type="datetime-local" name="publish_date" id="publish_date" placeholder="Published at" class="bg-gray-100 border-2 w-full p-4 rounded-lg @error('publish_date') border-red-500 @enderror" value="{{ old('publish_date', $post->publish_date) }}"> @error('publish_date') <div class="text-red-500 mt-2 text-sm"> {{ $message }} </div> @enderror </div> <div> <button type="submit" class="bg-blue-500 text-white px-4 py-3 rounded font-medium w-full"> Update </button> </div></form>Here, we should pay attention to not yet-seen syntax $post->{'post:'.$locale} that’s described here. This allows us to get the translated attribute based on the specific locale (in our case it’s either en or es). Pretty cool!
There’s no one-size-fits-all solution for localization. It can be really complex and include everything in the application or it can be as simple as just translating static text.
I’ll try to summarize the main points of this course:
- Translating text. You can install a package to move translations to a database/Excel sheet but that is not mandatory.
- Translating validation/form attributes. You just use what Laravel provides.
- Translating routes. I would recommend the https://github.com/mcamara/laravel-localization package to save a lot of time and effort.
- Localizing dates. You can use Carbon localization feature.
- Localizing currencies. You can use PHP’s
NumberFormatterclass. - Translating DB Models. Not required to have a package but both spatie/laravel-translatable and astrotomic/laravel-translatable can be really beneficial.
You can also use a combination packages. For example:
- https://github.com/mcamara/laravel-localization – Translating routes
- https://github.com/MohmmedAshraf/laravel-translations or https://github.com/nikaia/translation-sheet – Translating text via UI
- https://github.com/Astrotomic/laravel-translatable – Translating DB Models
I hope this course gave you a good overview of the most important packages and how to use them.
If there are any questions or suggestions, feel free to write a comment below.
[/et_pb_text][/et_pb_column]
[/et_pb_row]
[/et_pb_section]
Valuable info. Fortunate me I discovered your site accidentally, and I am surprised why this accident did not took place earlier!
I bookmarked it.
Good to know someone found it helpful. i teach in my local area and this was basically for them.
Happy coding!!!
Its like you read my mind! You appear to know so much about this,
like you wrote the book in it or something. I think that you can do with a few pics to drive the message home a
little bit, but instead of that, this is magnificent blog.
An excellent read. I’ll certainly be back.
Greetings, I believe your site may be having browser compatibility issues.
Whenever I look at your site in Safari, it looks fine however, if opening in I.E., it has some overlapping issues.
I merely wanted to give you a quick heads up! Aside from that, great website!